

Managing WordPress downloadable files means more than putting a link on a page. You need to control who downloads your files, how many times they can do it, and when access expires — all without wrestling with raw server directories.
The Filr plugin gives you those controls inside the WordPress admin. This guide walks through the full setup, from creating your first library to monitoring download activity.
Why Control Who Downloads Your Files?
File-download controls in WordPress let you cap download counts, restrict access by user role, or automatically expire content on a set date. Three scenarios explain when these controls matter most.
Download count limits. If you run an online training program capped at 200 enrolments, set each resource to allow exactly 200 downloads. Once downloads hit that threshold, the file goes offline automatically — no manual intervention required. The same logic works for limited-time offers: make a coupon PDF available to the first 100 people, and it disappears as soon as the 100th download completes.
Date-based expiry. You can set a conference registration form to expire two weeks before the event. Similarly, a membership-site resource pack can stop being downloadable the day the membership period ends. Filr handles the expiry automatically, so you don’t have to remember to unpublish anything.
Access restriction by user role. You may want only paying members or logged-in subscribers to reach a file at all, regardless of download count or dates. For that kind of gating, see the dedicated guides on restricting downloadable files in WordPress and password-protecting downloads.
For one-time-use links or advanced expiry rules, the create one-time download links and expire document downloads guides go deeper on each method. This article covers the management workflow.
How to Manage File Downloads in WordPress Using Filr
The most straightforward way to manage and control WordPress downloadable files is with Filr — a lightweight document library plugin that handles upload, protection, download limits, and front-end display in one place. Here is the full process:
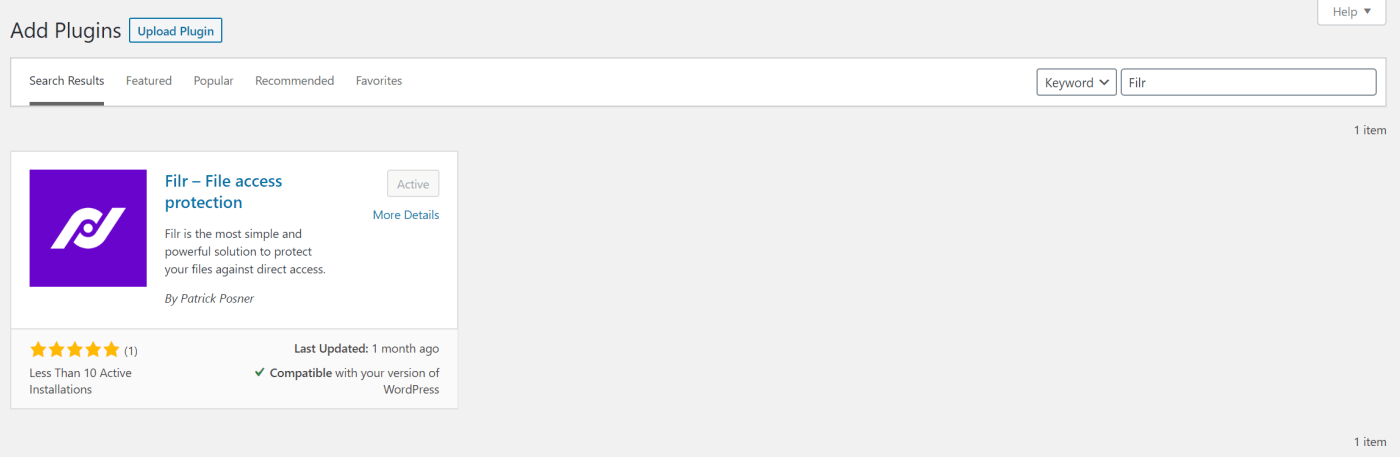
Step 1: Install and Activate Filr
Filr uploads, protects, and shares files securely. It stores everything in a protected server folder — not the WordPress Media Library — so Filr blocks direct-URL access by default.
The free version displays a front-end download table. The pro version adds download-count limits, date expiry, and filename encryption. Get the Filr plugin, then install and activate it on your site. A new Filr menu item appears in your WordPress sidebar.
Step 2: Create a Library
Go to Filr › Libraries. Enter a name and description for your new library, then click Add New Library. The library appears in the table on the right, along with a generated shortcode — copy that to your clipboard for Step 5.
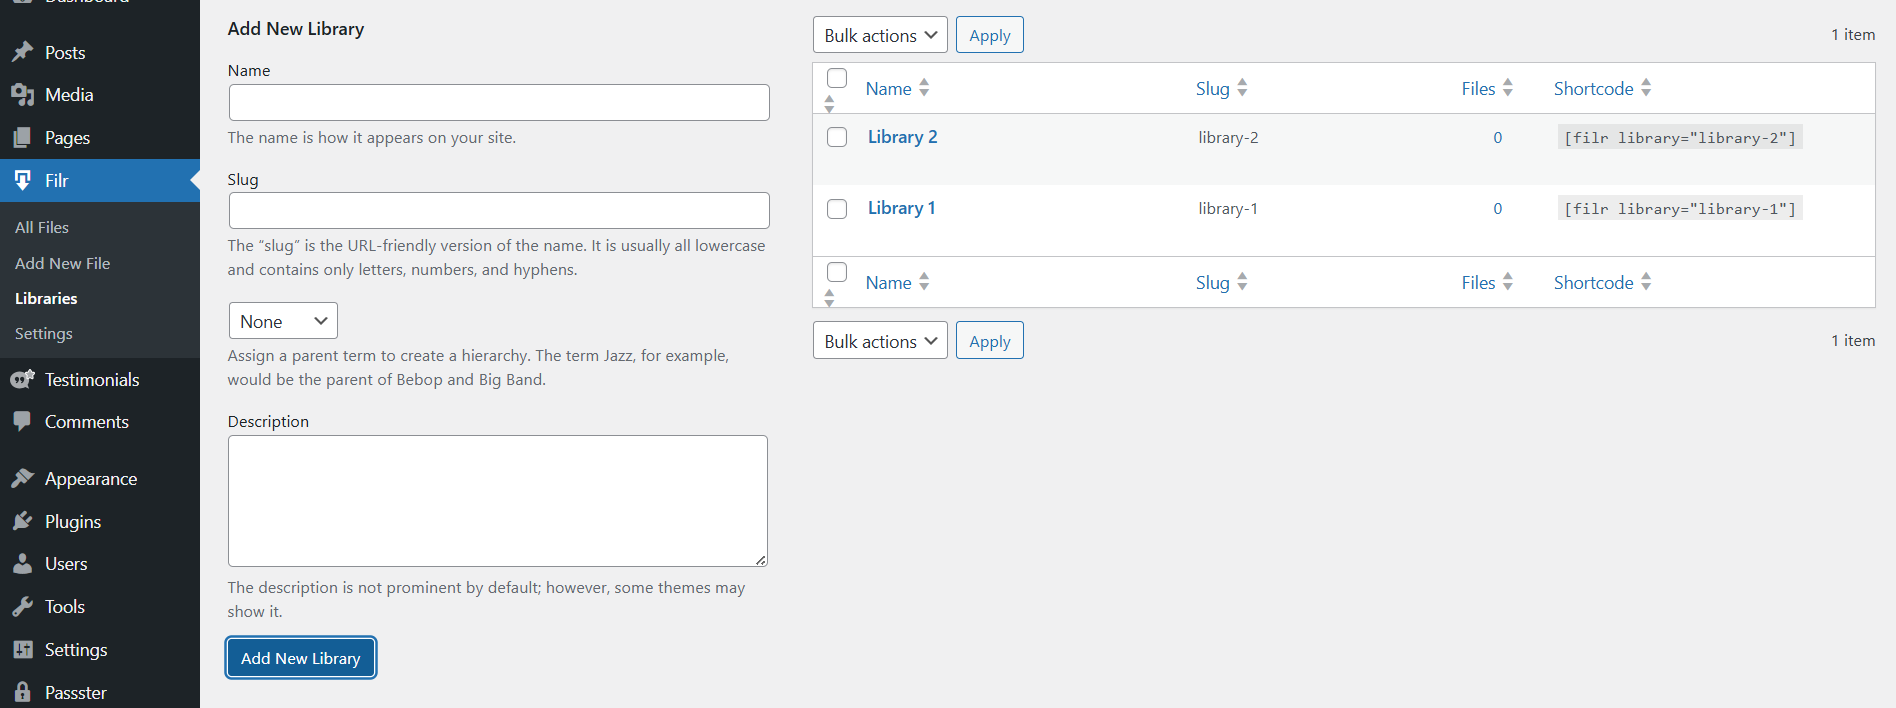
Libraries keep your files organised in the back-end and make it easy to display grouped sets of files on specific pages.
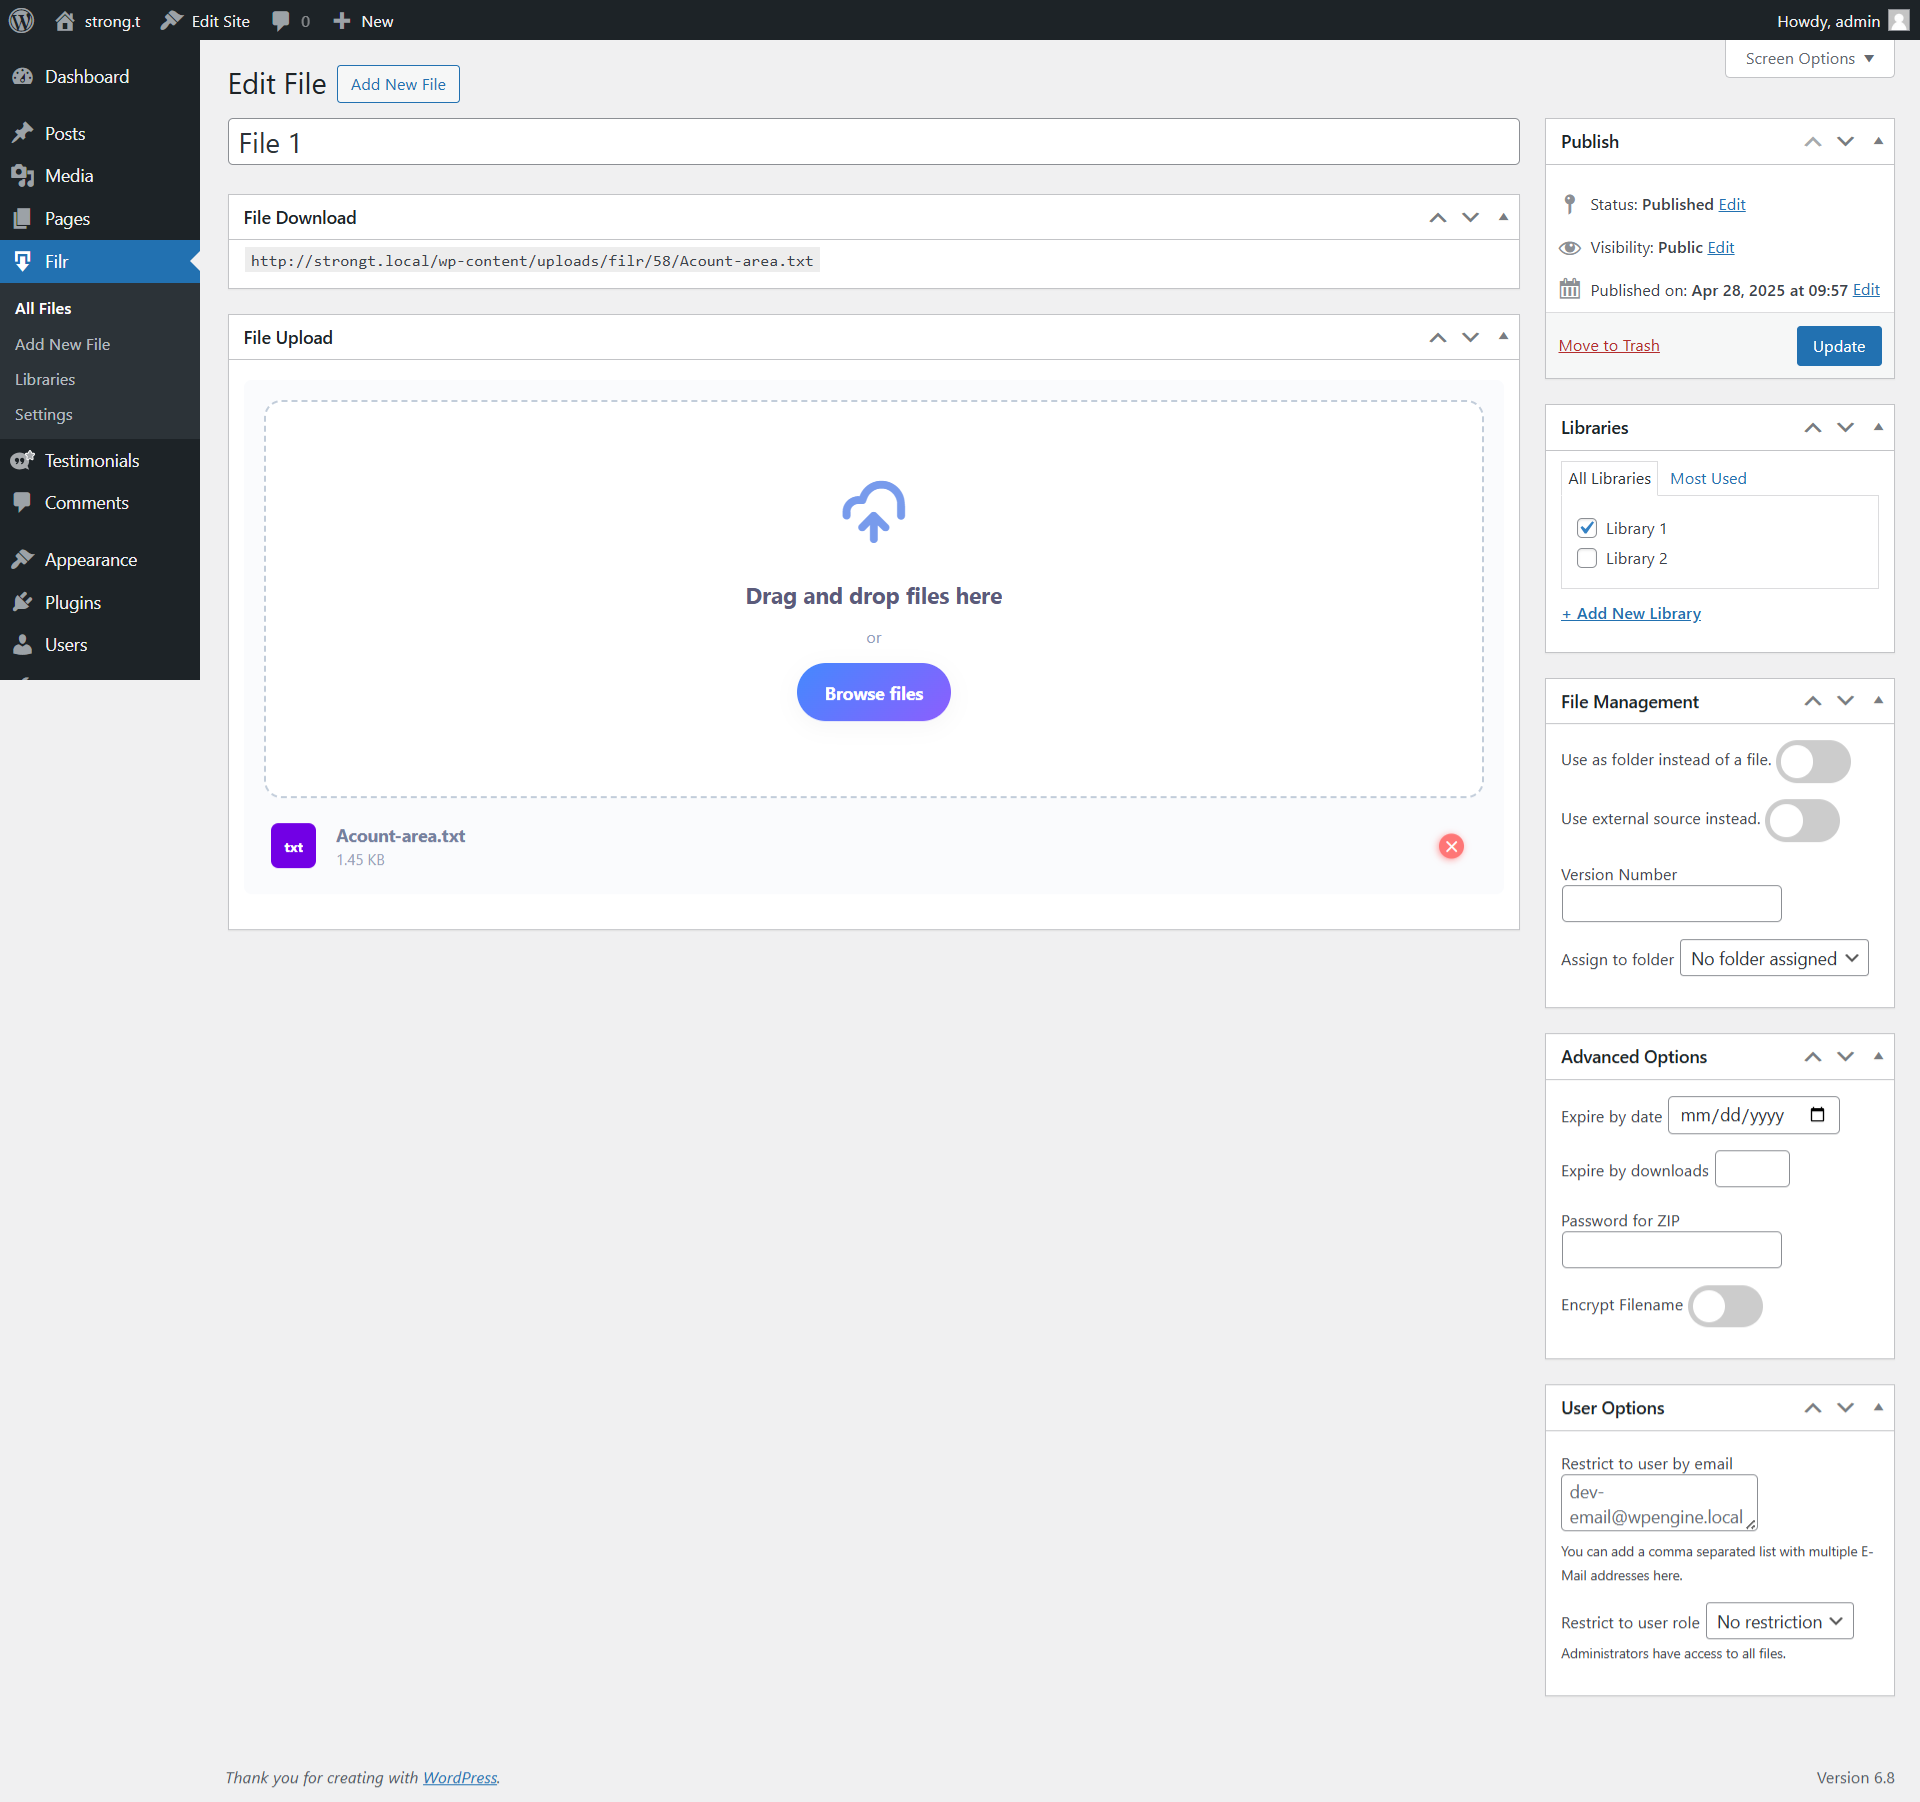
Step 3: Upload Your Files
Go to Filr › Add New and give your file upload a title. Use the File Upload metabox to add your content, then select your library from the Libraries sidebar metabox.
Filr supports two upload modes:
- Individual files — one file downloads per button click. Best for letting users choose specific documents.
- Multiple files — Filr bundles all uploaded files into a zip archive and generates one combined download link.
You can also enable Encrypt Filename to obscure the actual filename in the download URL.
To set a download limit or expiry date, open the Advanced Options metabox before publishing:
- Download count limit — enter the number of downloads to allow. Once downloads hit that number, the file becomes unavailable.
- Expiry date — pick a date after which the file stops being downloadable.
Click Publish to continue.

Step 4: Protect Your Files (Optional)
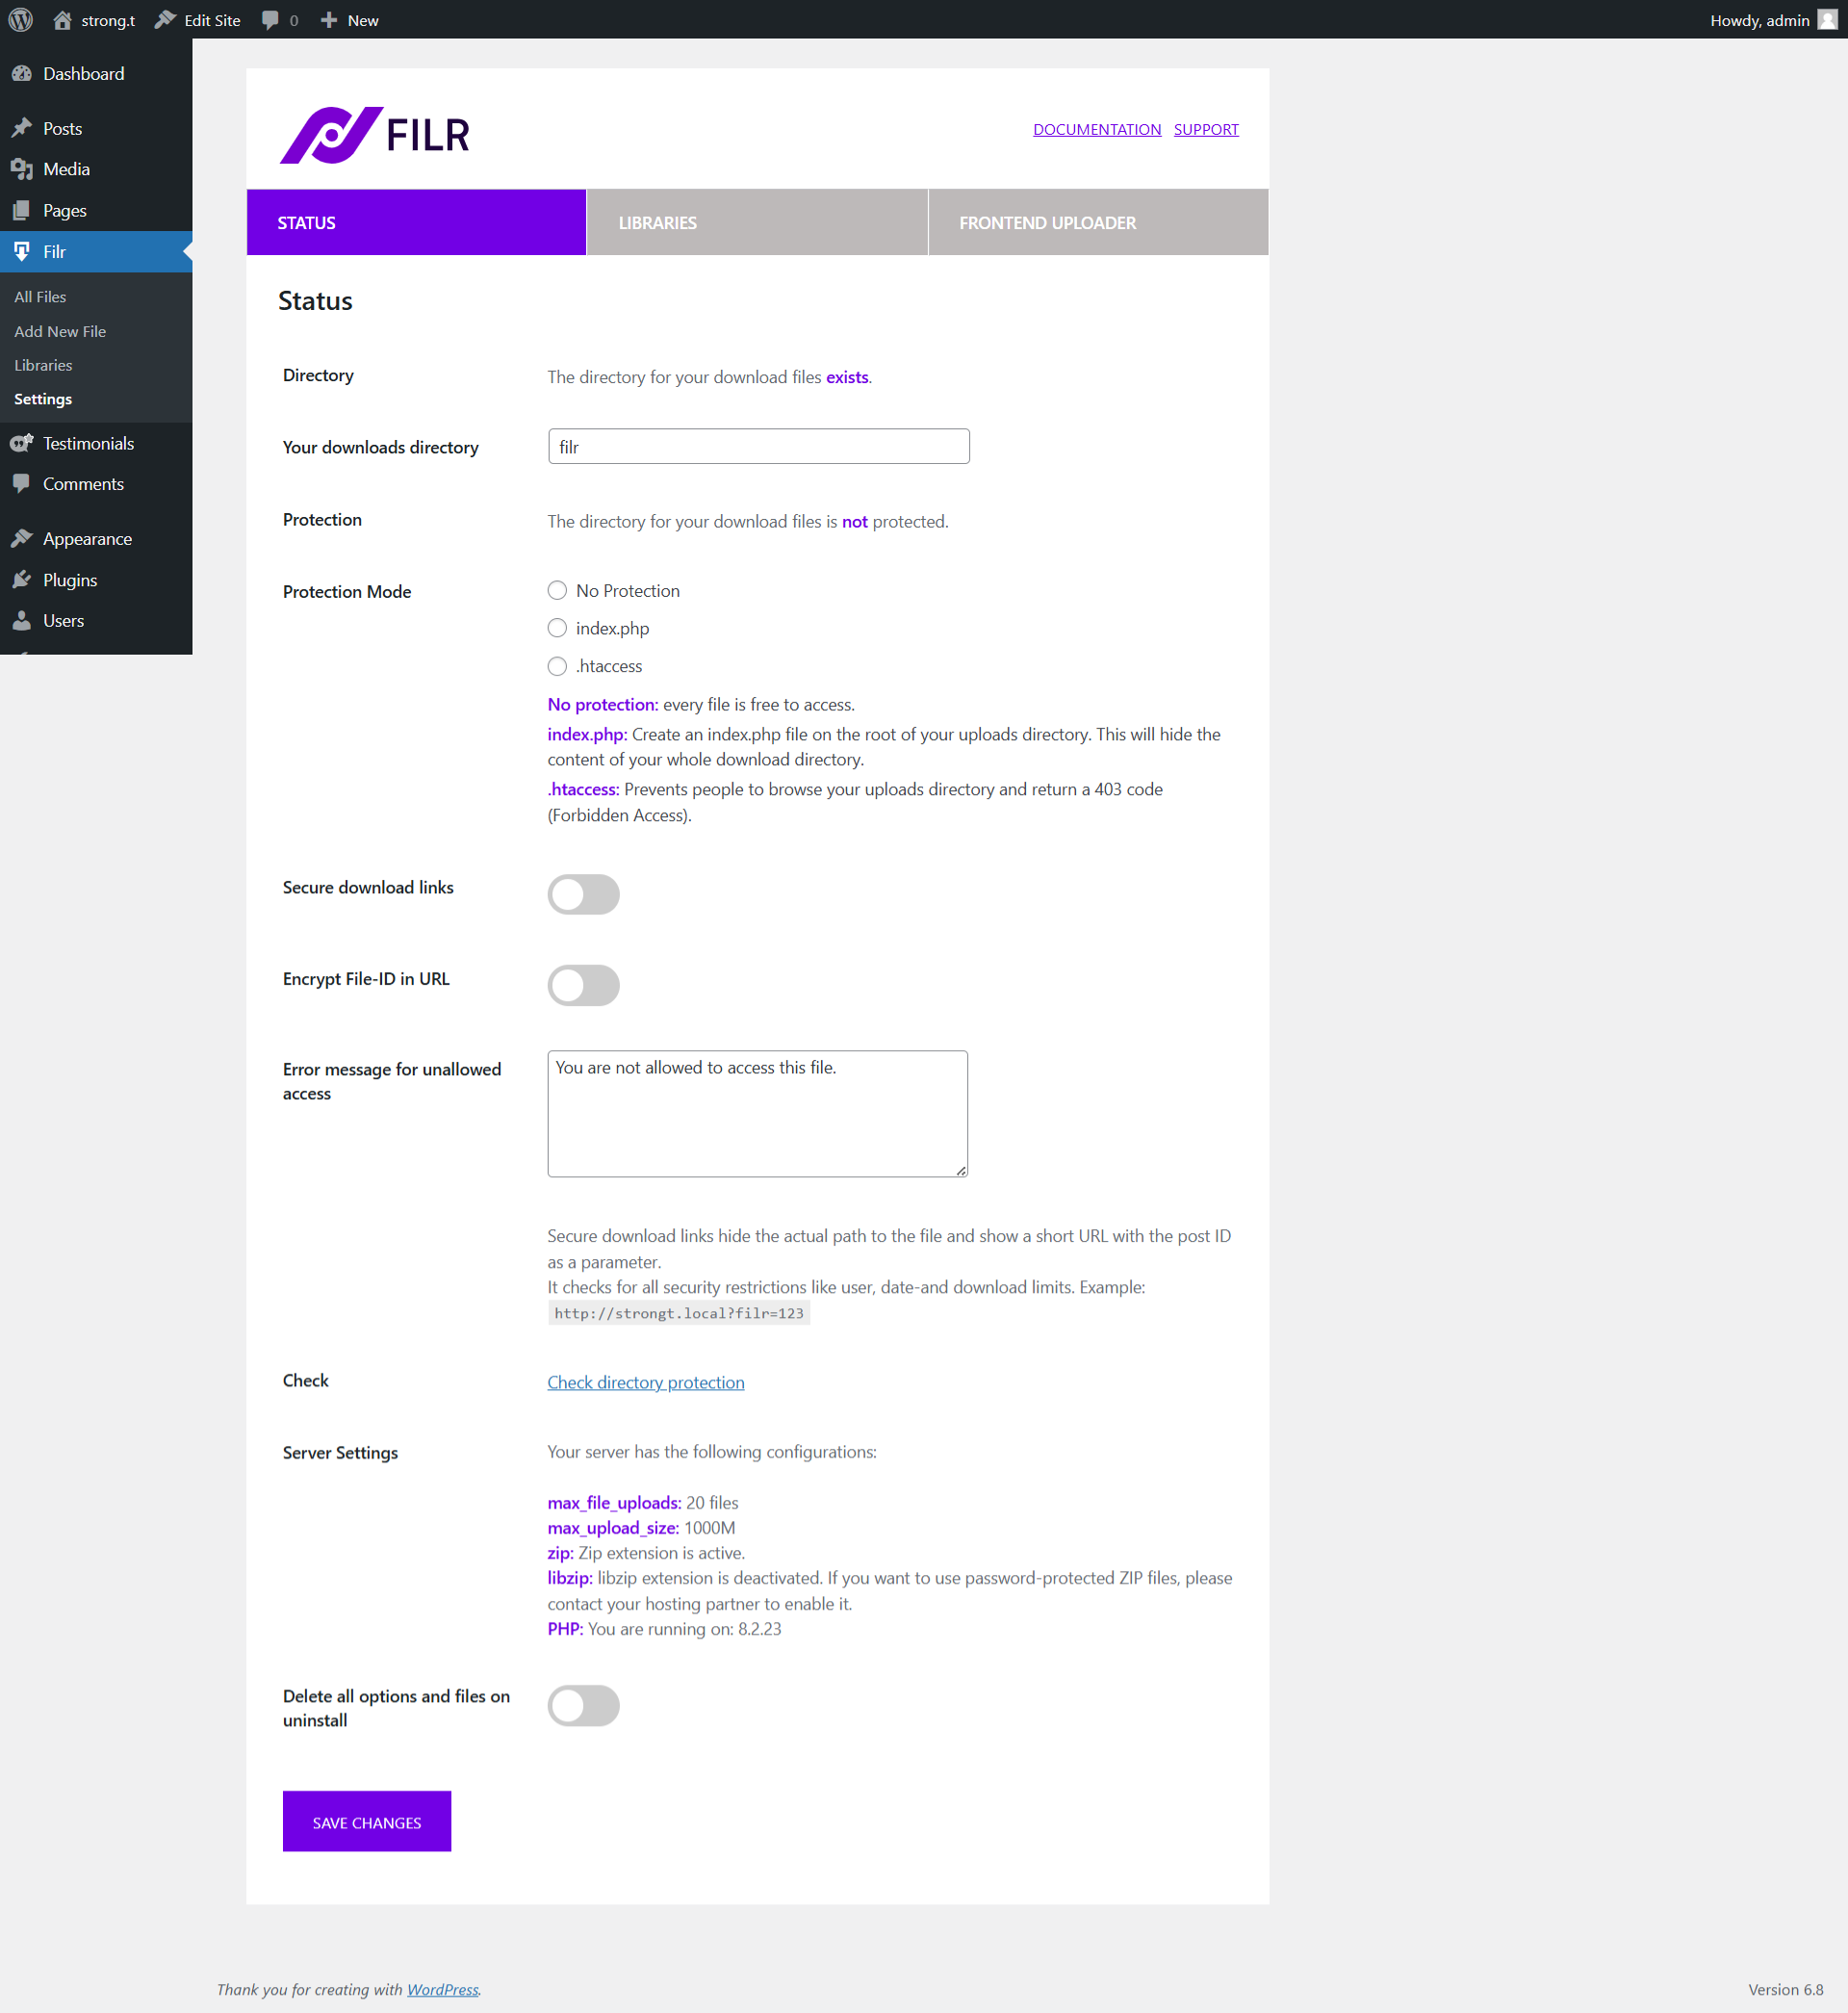
Filr provides three server-level protection modes, configured under Filr › Settings › Status:
- No protection — files are accessible via direct URL. Suitable for fully public downloads.
- index.php — hides the entire uploads directory listing.
- .htaccess — returns a 403 Forbidden response for anyone trying to browse the uploads directory directly.
Select the mode that fits your security needs, click Save Changes, then use the Check directory protection link to confirm the setting took effect.
Step 5: Display the Download Table
Go to Pages › Add New, add a shortcode block, and paste in the shortcode from Step 2. Publish the page and preview it on the front-end — the file table shows each document with its download button.
To adjust how the table looks, visit Filr › Settings › Libraries to customise column layout, button styling, and other display options.
Step 6: Monitor Your Download Activity
Tracking how often files get downloaded helps you identify your most popular resources. It also flags unusual activity — for example, a file accumulating downloads faster than your set limit should allow.
In the Filr admin, Filr › Files shows a running download count for each file. For deeper analytics — clicks by date, referrer data, or user-level tracking — pair Filr with a Google Analytics integration such as MonsterInsights, which auto-tracks file-download events without extra configuration.
If you need to see exactly which users downloaded which files, the restrict downloadable files in WordPress guide covers user-level access controls in detail.
Frequently Asked Questions
Filr (WP Document Library) suits teams that need an organised library with download limits, expiry dates, and a file-table display. For selling digital products, Easy Digital Downloads is the specialist option. For membership-based access control, MemberPress adds the most flexibility.
Filr logs a download count per file, visible in the Filr admin. For detailed analytics — events by date, user, or referrer — connect Google Analytics via MonsterInsights, which auto-tracks download clicks as events without extra configuration.
MonsterInsights automatically detects clicks on PDF links and reports them as file-download events in Google Analytics. Or use Filr’s built-in download counter for a simple total per file, including PDFs.
In Filr, open any file’s Advanced Options metabox and enter a number in the download count limit field. Once downloads reach that number, the file becomes unavailable. For per-user limits and role-based restrictions, see restrict downloadable files in WordPress.
Wrapping Up
Managing and controlling file downloads in WordPress does not require a full eCommerce setup. Filr handles the core workflow — library creation, secure upload, download limits, date expiry, and front-end display — in one lightweight plugin.
For deeper control over who can access your files, the following guides cover each method in detail: password-protecting downloads, restricting downloadable files, one-time download links, and expiring document downloads.