

WordPress doesn’t protect PDF files by default. Once you upload a file to the media library, anyone who knows the URL can download it — no login, no payment, no questions asked. If you want to protect PDF files in WordPress, you need a plugin that adds a gating mechanism to each document.
Gating mechanism: A rule that controls who can access a file and under what conditions — for example, requiring a password, completing a verification step, or limiting access to a set number of downloads.
Five distinct methods let you gate individual PDF files, each suited to a different use case. Before picking one, it helps to understand what problem each method actually solves.
Why Protect Your WordPress PDF Files
PDF files carry real value — ebooks, contracts, course materials, client deliverables. Without a gating mechanism, two problems emerge. WordPress stores every uploaded file in a public /wp-content/uploads/ directory with no access control by default — the direct URL is enough to download any file, regardless of what page it appears on.
First, direct links spread freely. A user who legitimately accesses a PDF can email the URL to anyone. Second, search engines can index uploaded files, making them publicly discoverable even when you never intended public access.
Here’s what’s at risk when PDFs go unprotected:
- Unauthorized access — Anyone with a direct link can download the file, bypassing any page-level restrictions you’ve set.
- Revenue loss — If you sell PDFs as digital products, unprotected files can circulate freely, cutting into sales.
- Data exposure — Contracts, reports, and internal documents can reach unintended audiences, creating legal and reputational risk.
None of these problems require a sophisticated attacker. A shared URL is enough.
Which PDF Protection Method Is Right for You?
Choosing the right method upfront saves rework. The five methods differ in what they restrict, what they require from users, and which plugin they use.
| Method | Best for | Requires |
|---|---|---|
| Auto-expire by date | Time-sensitive docs, event materials | Filr Pro |
| Auto-expire by downloads | Limited-distribution files | Filr Pro |
| Password protection | Exclusive content for known recipients | Passster |
| reCaptcha gate | Reducing bot downloads, light friction | Passster |
| Unlock via link | One-click access for specific users | Passster |
For expiry-based protection, Filr (also known as WP Document Library Pro) handles both date and download limits. For access-control gating — password, reCaptcha, and link-based unlock — Passster is the plugin to use.
If you want to protect your entire WordPress media library rather than individual PDFs, see how to protect WordPress media files — that’s a different approach handled separately.
Method 1: Auto-Expire PDF Files by Date
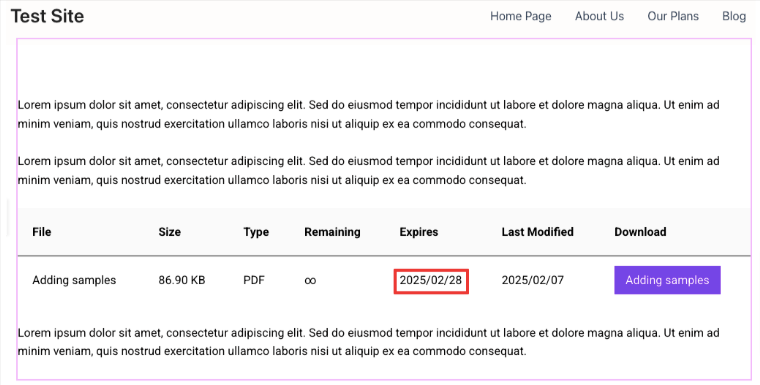
Date-based expiry makes a PDF download unavailable after a specific date. This suits time-sensitive materials: event handouts, limited-time offers, or compliance documents with a known review cycle.
To use this method, you need the Pro version of Filr. Install and activate it on your WordPress dashboard before starting.
Step 1: Create a Document Library
Go to Filr > Libraries. On the right side, fill in the Add New Library panel: enter a library name and a slug (the name in lowercase with hyphens). Click Add New Library.
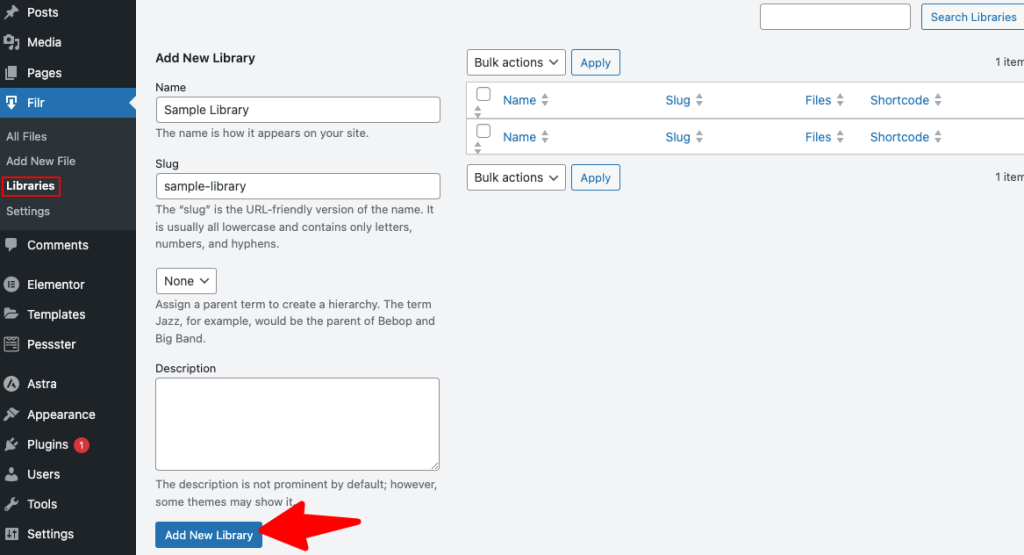
The library appears on the right with a shortcode. Copy that shortcode — you’ll need it to display the library on a page.
Step 2: Add Your PDF File
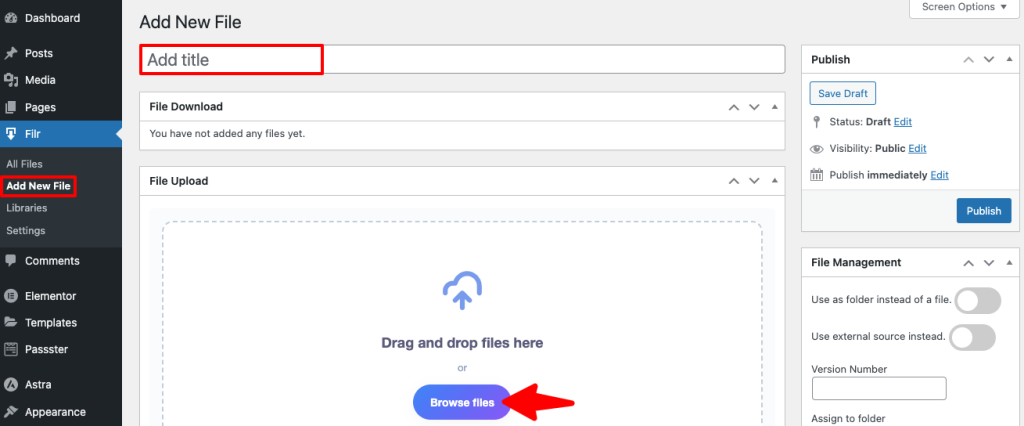
Go to Filr > Add New File. Add a title, then use the Browse Files button to upload your PDF.

Step 3: Set the Expiry Date
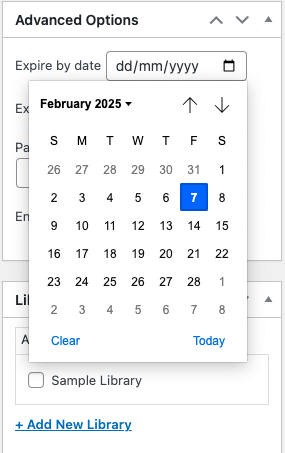
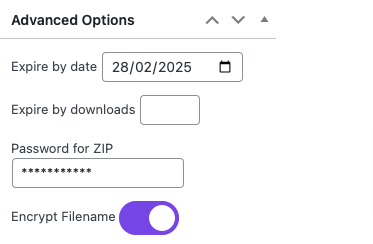
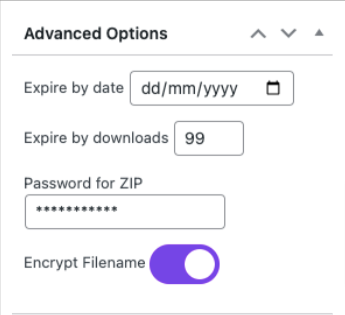
In the Advanced Options panel on the right, enter the date you want the file to expire. Also set a Password for ZIP and toggle Encrypt Filename on.
Scroll down to Libraries and select the library you created in Step 1. Click Publish.
Step 4: Display the PDF on a Page
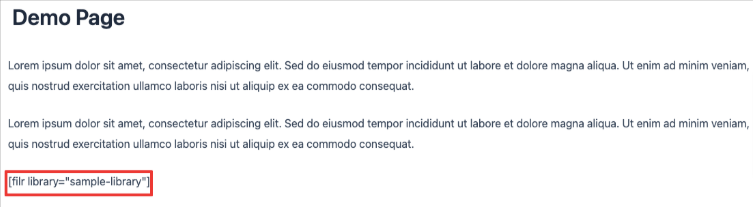
Open the page where you want the PDF to appear (or create a new one). Paste the library shortcode into the page content and publish.
Once live, users who visit after the expiry date find the download unavailable. For more expiry strategies, see 2 ways to expire document downloads.
Method 2: Auto-Expire PDFs by Download Count
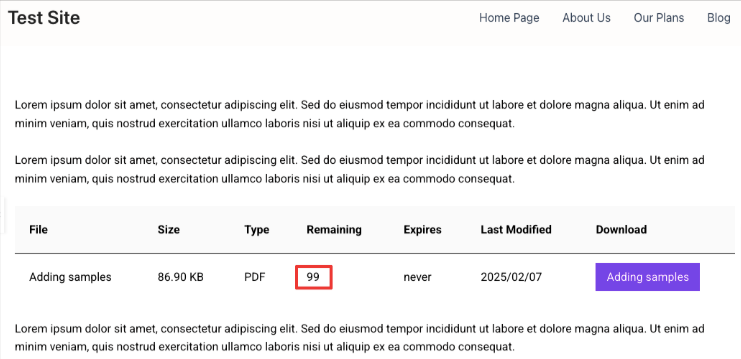
Instead of a date limit, you can cap the total downloads allowed for a file. After the limit hits, the file stops being available. This works well for limited-edition content or files you want distributed in a controlled batch.
Follow Steps 1 and 2 from Method 1. Then, in Advanced Options, enter a download count instead of an expiry date. For example, entering 99 means the file becomes unavailable after the 99th download.
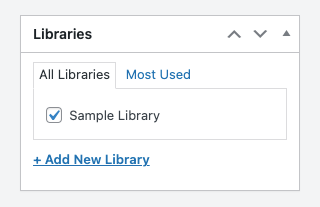
Assign the library, publish the file, and add the shortcode to your page as before.
For deeper coverage of download limits and one-time links, see how to create one-time download links in WordPress.
Method 3: Password-Protect PDFs in WordPress
Password protection adds a form in front of your PDF. Users must enter the correct password before they can access or download the file. This is the right choice for sharing exclusive content with a known group — course students, clients, or paid subscribers.
For this method, use Passster. Install and activate it from your WordPress dashboard.
Step 1: Create a Protected Area
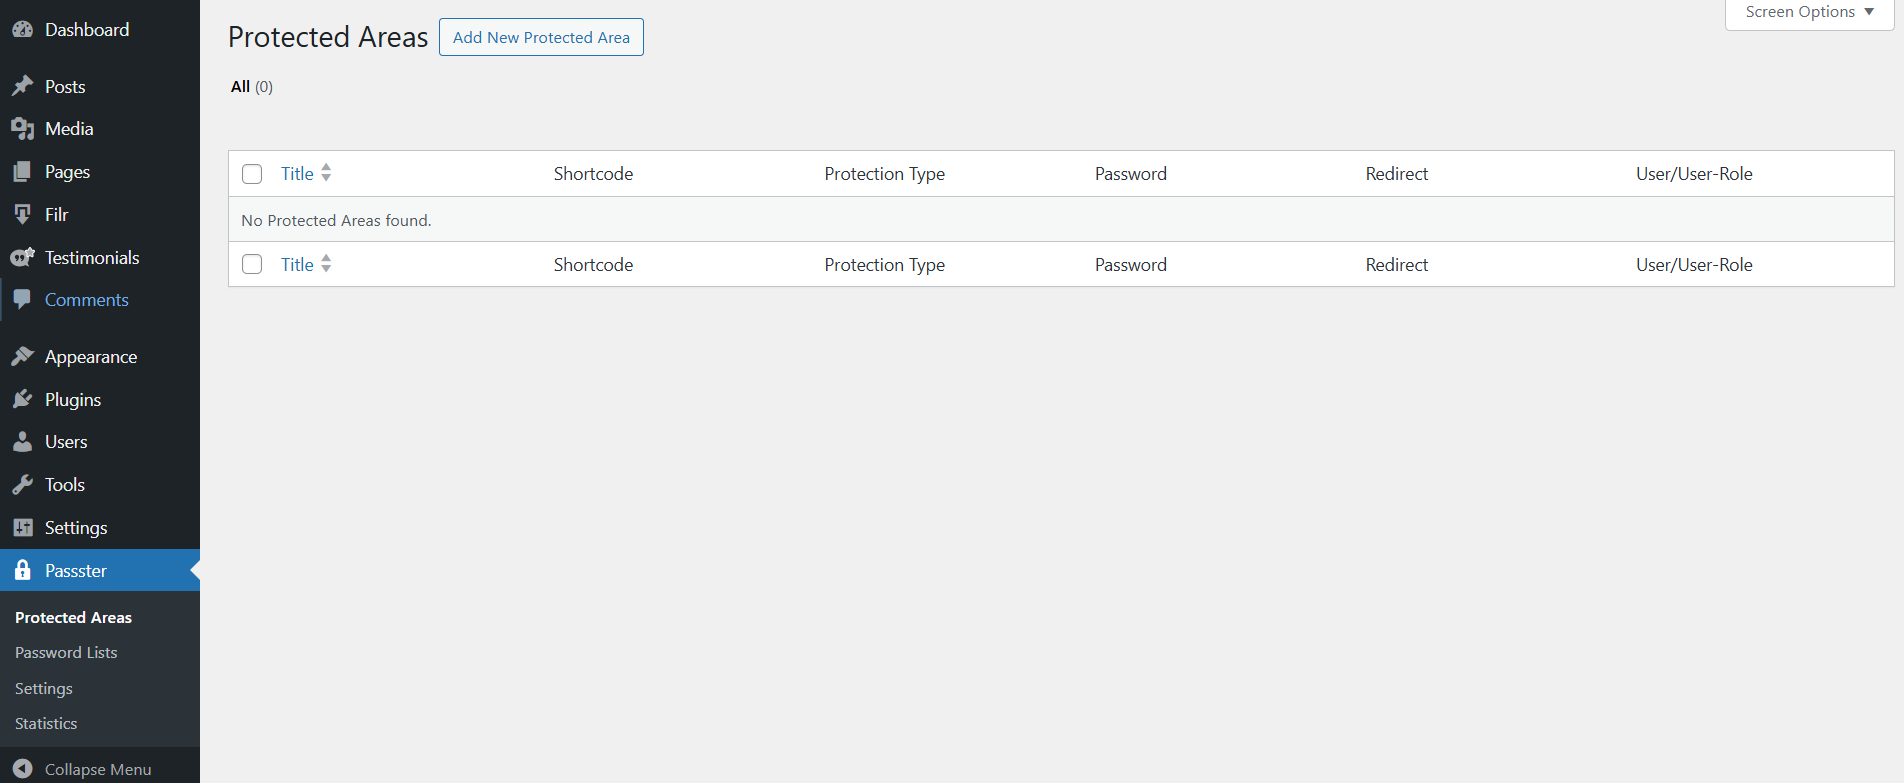
Go to Passster > Protected Areas > Add New Protected Area. Add a title for the area.
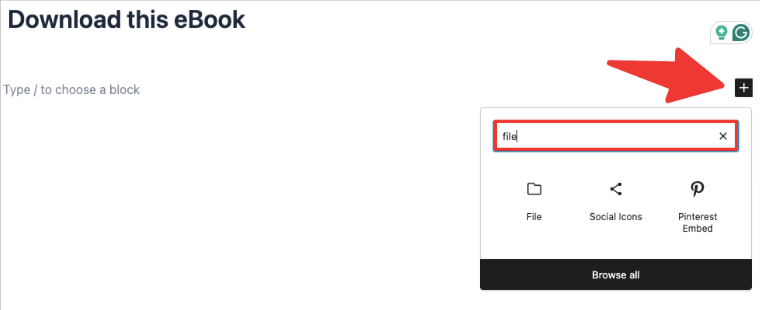
In the Gutenberg editor, click the + icon and search for File. Select the File block, then upload your PDF using the Upload button.
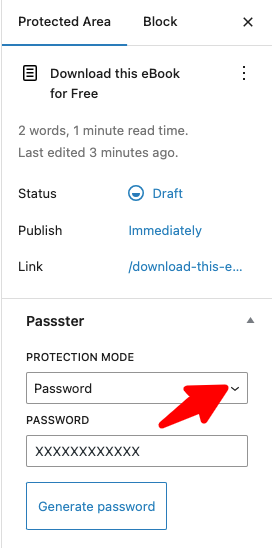
On the right panel, under Protected Areas, find Protection Mode. Open the dropdown and select Password. Then click Generate Password.
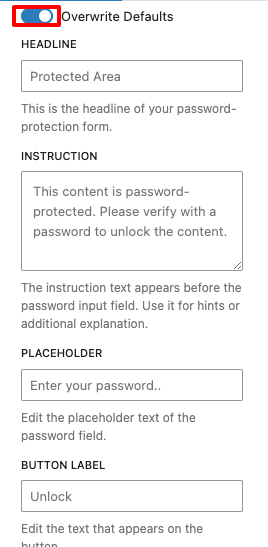
Optionally, toggle on Overwrite Defaults to customise the form — change the headline text, add instructions, or relabel the button.
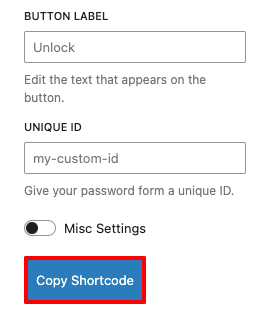
Scroll down and click Copy Shortcode. Then hit Save > Publish.
Step 2: Add the PDF to a Page
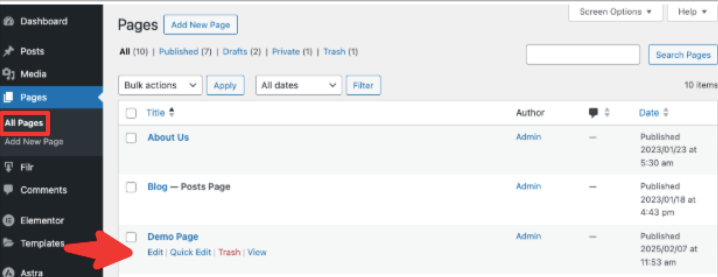
Go to Pages > Add New (or open an existing page). Paste the shortcode into the page content and publish.
Anyone without the correct password sees the form rather than the file.
This walkthrough covers the PDF-specific setup. For the broader download-protection picture — including WP Document Library’s own password options — see how to password protect downloads in WordPress.
Method 4: Protect PDFs with reCaptcha
reCaptcha adds a human-verification checkpoint before download. It won’t stop a determined human, but it cuts automated scraping and bot downloads. It’s also a useful friction layer if you want to limit casual sharing without requiring users to remember a password.
Use the same Passster plugin as in Method 3. Follow the same steps, with one change: in Protection Mode, select reCaptcha instead of Password.
Creating the protected area, uploading the file, copying the shortcode, and adding it to a page all work identically to Method 3.
Method 5: Unlock PDF Access via Encrypted Link
The unlock-via-link method generates an encrypted URL. Share that link with specific users, and clicking it grants immediate access to the protected content — no password form required. This suits situations where you want frictionless access for vetted recipients: a client, a team member, or a newsletter subscriber.
Unlock via link: Passster generates an encrypted URL tied to a specific password-protected page. Anyone with the link bypasses the password form automatically; everyone else sees the standard protection form.
Passster generates the link from the page settings. Here’s how.
Step 1: Set Up the Page and Generate the Link
Go to Pages > Add New Page. Add your title and content. In the right panel, under Page, click Activate Protection. Under Password Mode, select Password and click Generate Password.
Once the password generates, click Copy Unlock Link. This produces an encrypted URL that bypasses the password form for whoever receives it.
Share the link directly with your intended users. Anyone who clicks it goes straight through to the PDF. Users who arrive at the page normally still see the standard protection form.
Frequently Asked Questions
WordPress protect PDF files at the page level using the built-in Visibility > Password Protected setting, but this only secures the page — not the file URL itself. For file-level password protection, use Passster: create a Protected Area, upload the PDF, set Protection Mode to Password, and embed the shortcode on any page. Only users who enter the correct password can then download the file.
No. Any file uploaded to WordPress is publicly accessible via its direct URL by default. A plugin is required to gate access. This is true even if the page containing the PDF is password-protected — the underlying file URL in the media library remains open.
Yes. You can upload PDF files through the WordPress media library or directly inside a page or post using the Gutenberg File block. WordPress doesn’t provide any access restriction for these files by default, which is why a plugin like Filr or Passster is needed if you want to control who can download them.
Yes. The two plugins address different gating needs and don’t conflict. Use Filr for expiry-based gating on individual documents and Passster for access-control gating — password, reCaptcha, or unlock links.
Expiry by date makes the file unavailable after a calendar date — useful for time-limited offers or event materials. Expiry by downloads caps the total number of times the file can be downloaded — useful for limited-distribution batches. Both are Filr Pro features configured in the Advanced Options panel.
Methods 1 and 2 (date and download expiry) require Filr Pro. Methods 3, 4, and 5 (password, reCaptcha, unlock via link) use Passster, which has its own pricing separate from Filr.