


Every file uploaded to the WordPress Media Library gets a public URL. Anyone with that link can download it — no login required. To restrict file downloads in WordPress so that only authorized users — specific roles, email addresses, or any logged-in user — can access them, you need a plugin that gates access at the file level.
The Filr plugin (WP Document Library) handles this. It stores files in a secure server folder instead of the public Media Library and lets you restrict access by user role or email with no code required.
Note: If you need to restrict downloads using a password rather than user roles, see our guide on how to password-protect downloads in WordPress. Role-based restriction works best when your users already have WordPress accounts on your site.
Why WordPress Files Aren’t Secure by Default
Files uploaded through the WordPress Media Library land in wp-content/uploads/. That directory is publicly accessible — anyone who guesses or finds the direct URL can download the file without logging in. For public images, that’s fine. For member resources, client documents, or internal company files, it’s a vulnerability.
Filr solves this at the storage level. Instead of saving uploads to the Media Library, Filr places each file in a protected server directory that blocks direct URL access. Every download request goes through Filr’s access-control layer first, which checks user authorization before serving the file. Filr has 5,000+ active installs on WordPress.org, making it one of the most used tools for this purpose.
When You Need to Restrict File Downloads by User Role
The role-based approach fits any site where users already have WordPress accounts. The three use cases below are the most common real-world deployments for role-based file restriction.
Membership sites
A membership site gates content behind a subscription or payment. Members expect exclusive resources — e-books, worksheets, video lectures — that non-members can’t simply grab by copying a link. Restricting downloads to a specific WordPress user role (such as Subscriber) or a list of member emails keeps those resources behind the paywall without requiring a separate checkout per file.
For more on this, see our tutorial on how to create members-only content in WordPress.
Agencies and client portals
Agencies regularly share deliverables, photo galleries, templates, and signed forms through a client portal. Granting access by email address or a custom “Client” role means each client sees only what belongs to them — no shared passwords to rotate and no risk of one client accidentally accessing a different client’s files.
Intranet sites
Companies use intranet sites to distribute internal documents: sales battlecards, HR policies, accounting templates. Restricting files by user role ensures each department accesses only its own materials, without any file ending up publicly exposed.
For a full walkthrough, see our tutorial on how to set up a WordPress intranet site.
How to Restrict File Access by User Role in WordPress
You’ll need the Filr plugin installed and activated, along with at least one file ready to upload. The full process takes four steps.
Filr — WP Document Library Plugin Easily upload, store, and share files in WordPress. Secure, flexible, and user-friendly document libraries for your next project. Get it now
Step 1: Create a file library in Filr
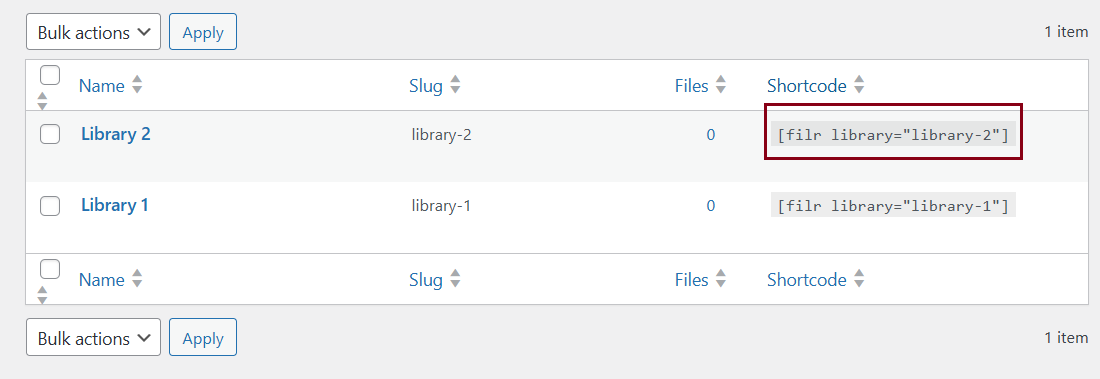
A library in Filr organizes related files into one collection and generates a shortcode (a short text snippet like [filr_library id="1"]) you’ll use to display those files on any page.
Go to Filr > Libraries in the WordPress admin. Enter a name and description for the library, then click Add New Library.
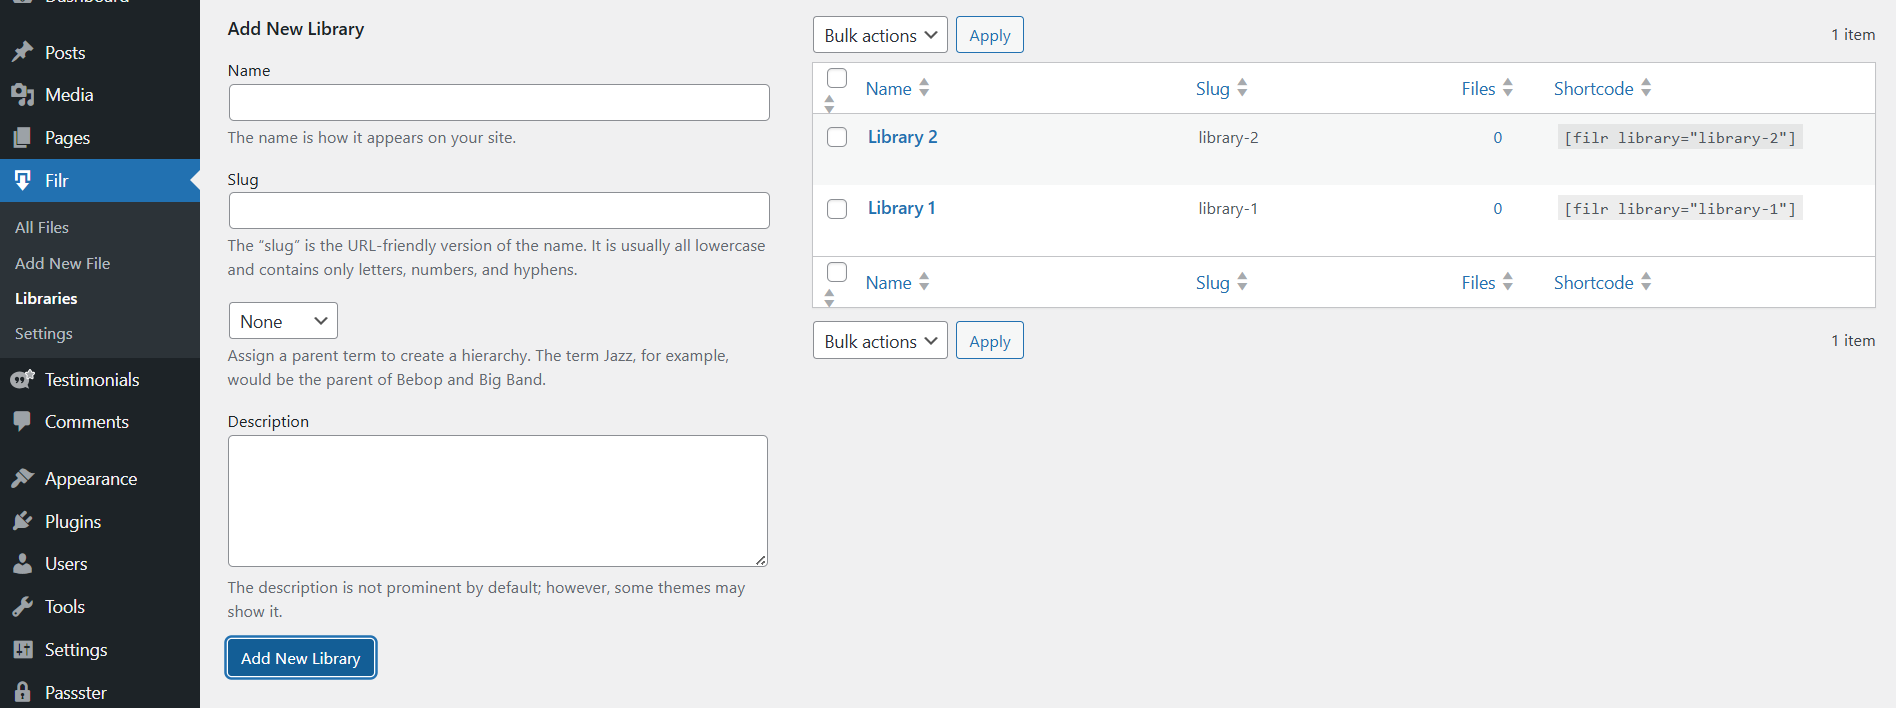
The library appears on the right side of the screen with its auto-generated shortcode. Copy that shortcode — you’ll need it in Step 3.
Step 2: Upload your files to Filr
Go to Filr > Add New. Enter a title, then use the File Upload meta box to select the files you want to share. In the right-hand sidebar, choose the library you created in Step 1 from the Library meta box.
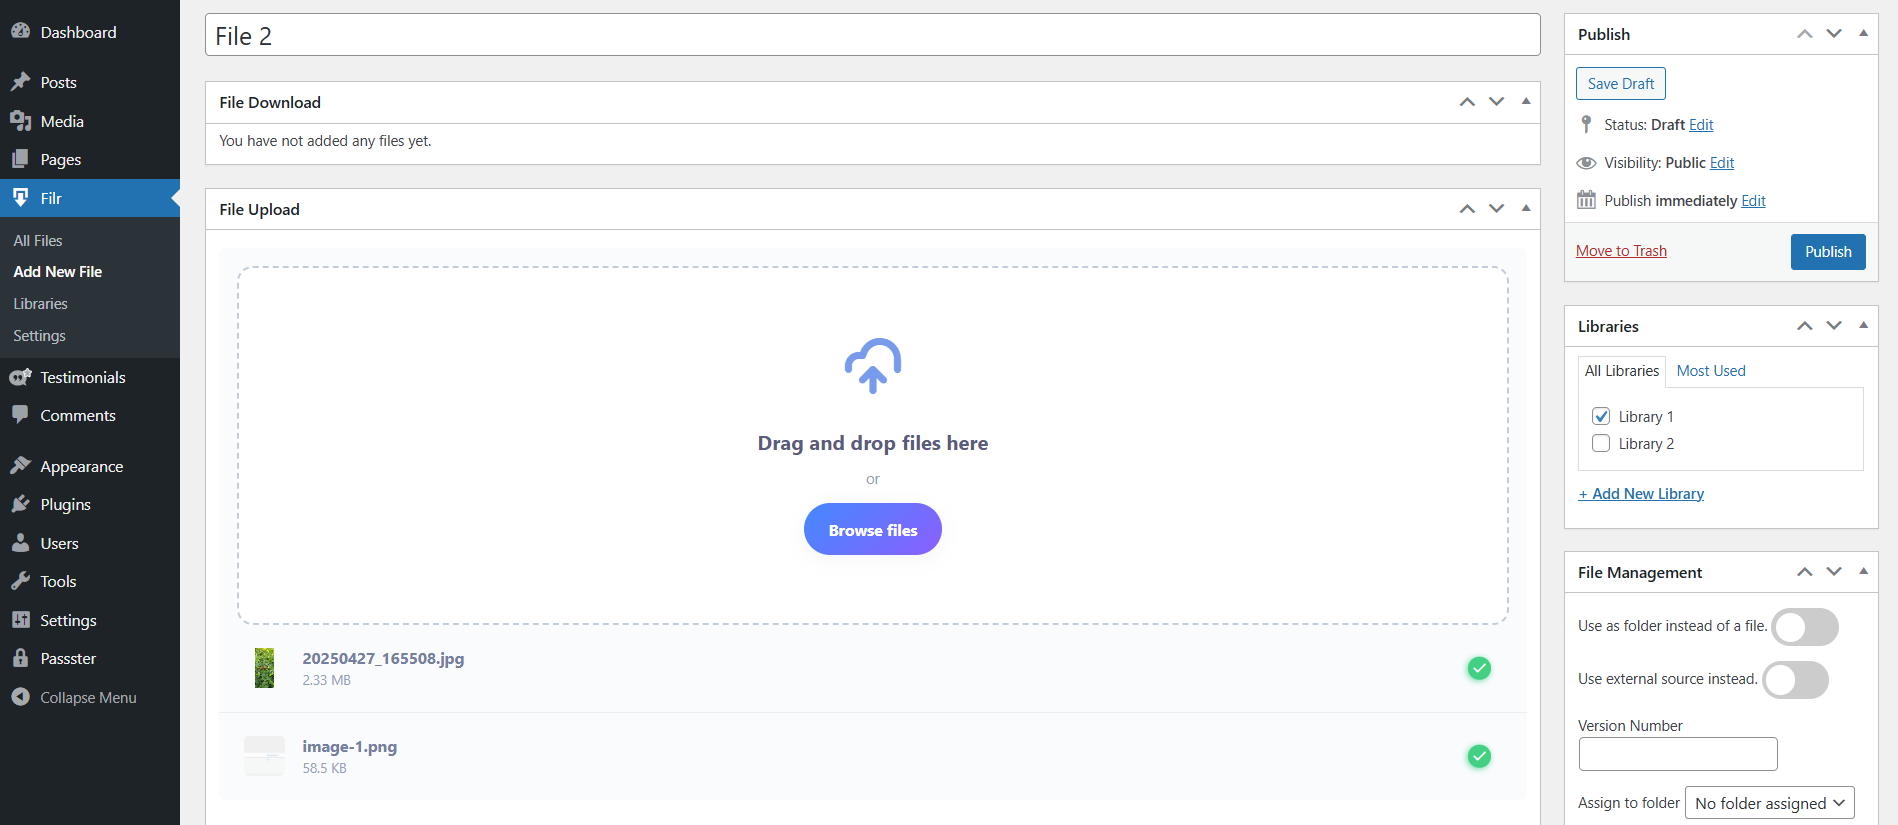
Three options to configure at this stage:
- Bundle files: Attach two or more files to a single entry so users download them as a package.
- Expiry options: Set files to expire by date or by the number of downloads — useful for time-limited resources.
- Filename encryption: Enable this to prevent anyone from guessing or sharing the raw file URL directly.
When you’re done, click Publish.
Step 3: Display the file library on a page
Go to Pages > Add New. Give the page a title, paste the shortcode from Step 1 into a shortcode block, then click Publish.
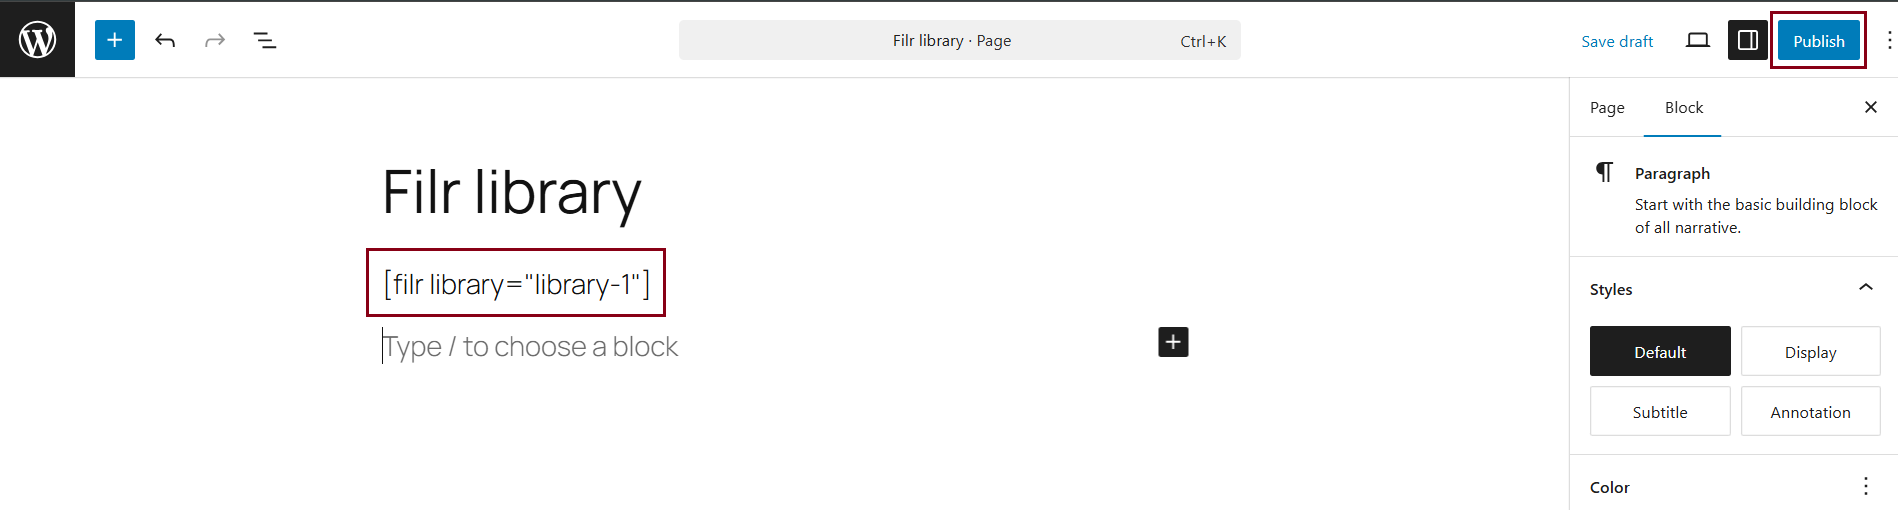
The front-end file library will appear on that page, listing each file with a download link.
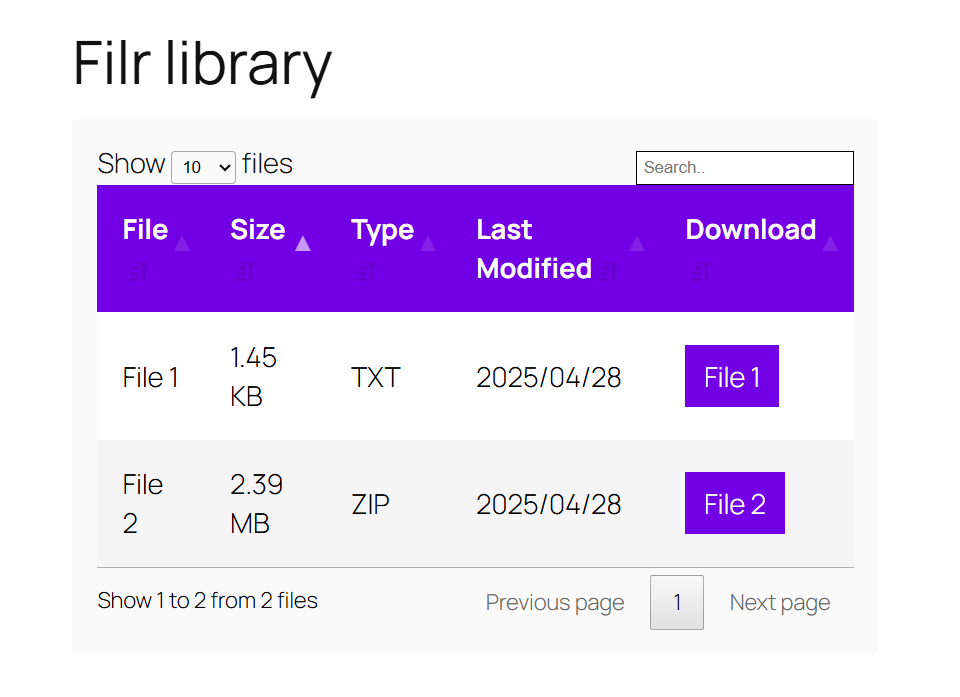
Pro tip: Head to Filr > Settings > Shortcode to customize the library’s appearance — adjust columns, show or hide file details, and match it to your site’s design — before you share the link with users.
Step 4: Restrict file access by user role or email
Open any file you’ve uploaded (Filr > All Files, then click to edit). Scroll to the User Options section. WordPress user roles (Subscriber, Editor, Administrator, and any custom roles) determine what each logged-in user can see and do — and Filr uses them to control file access directly.
Two restriction modes are available:
- Restrict by user role: Choose one or more WordPress roles. Only logged-in users with a matching role can download the file. To allow any logged-in user, select a baseline role like Subscriber that all registered users share.
- Restrict by email address: Enter specific email addresses. Only users logged in with those addresses can access the file.
You can combine both options for layered access — for example, restrict to the “Client” role and also limit to a specific set of email addresses.
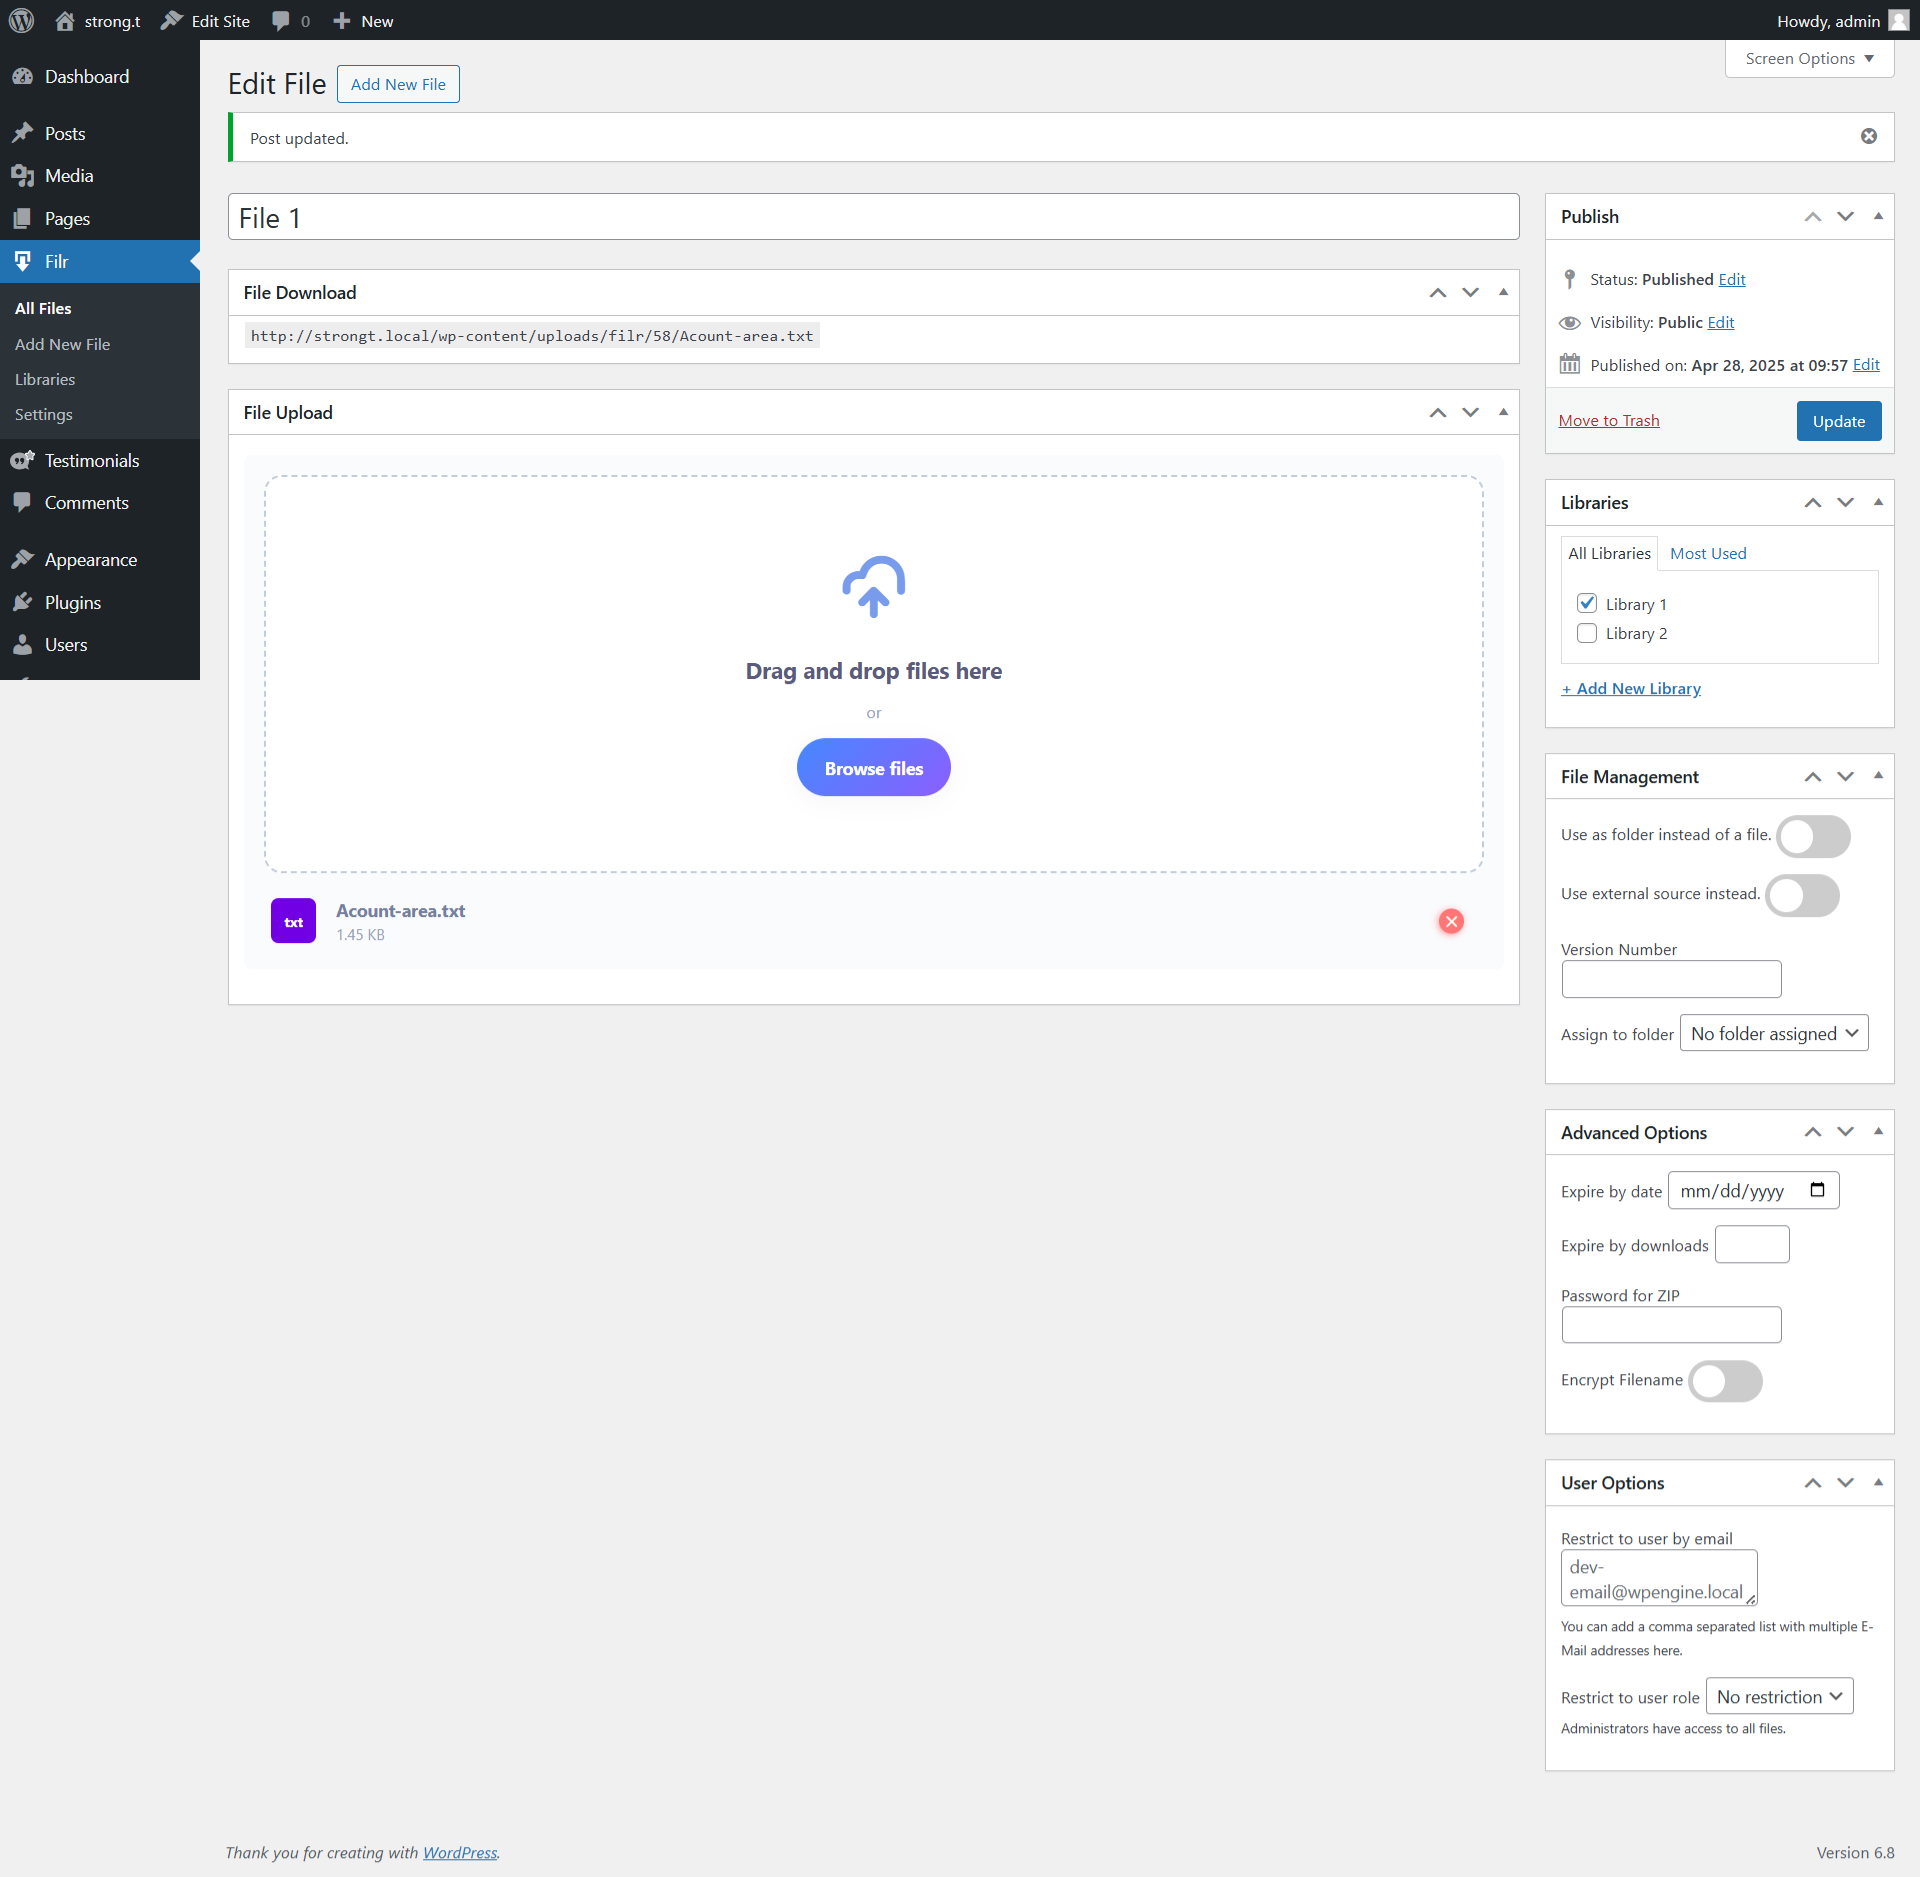
Important: Administrators bypass all file restrictions automatically. Test access with a separate account that isn’t an admin — create a test user, assign the target role, log in as that user in a private browser window, and confirm the file appears and downloads correctly.
Frequently Asked Questions
Install the Filr plugin (5,000+ active installs on WordPress.org), upload your files to a Filr library, then open each file and use the User Options > Restrict by user role setting to choose which roles can download it. Users without a matching role won’t see the download link.
The library hides any files the user can’t access. The download link doesn’t appear for restricted entries, so unauthorized users don’t see what they’re missing.
Upload the PDF as a Filr file entry and restrict it to your member role (for example, Subscriber or a custom “Member” role). Non-members won’t see the download link, and Filr’s secure storage blocks direct URL access.
Filr handles role and email-based restrictions natively. To add password gating on top, pair Filr with Passster. See our guide on how to password-protect downloads in WordPress for that approach.
Yes. In the file’s settings, cap the total number of downloads and set an expiry date — after which the file is no longer available, regardless of user role.
Filr restricts access at the individual file entry level rather than by file type. Upload only the files you want restricted to the Filr library; leave any public files in the standard Media Library.
Control Exactly Who Downloads Your Files
Restricting WordPress file downloads by user role is straightforward with Filr. In four steps — create a library, upload files, add a shortcode to any page, and set User Options — you have a protected document library that gates access by role or email, with no server configuration or code required.
Filr Easily upload, store, and share files in WordPress. Secure, flexible, and user-friendly document libraries for your next project. Get it now