

If you’re thinking of starting a membership site or already have one, you might consider building a members-only library for it. This makes it easy to share documents, files, and other downloadable resources with your members in an organized way.
In this post, we’ll take you step-by-step through the process of building a members-only library for your WordPress membership site.
Why you should build a members-only library for your WordPress membership site
A members-only library is a document library (or resource library) that only members have access to. Typically, it contains downloadable resources, PDFs, files, forms, and other members-only content. It may also contain audio lectures and video courses.
So, should you consider building a members-only library for your WordPress membership site? If you have a public-facing website and a membership site set up in WordPress, a members-only library can help you make exclusive content available to site members only.
It’s also an easy way to provide users different levels of access. For example, you might have multiple membership subscription programs e.g. Bronze Plan, Silver Plan, and Gold Plan. A members-only library allows you to share more content with members subscribed to the Silver Plan than those on the Bronze Plan.
You can set it up so that:
- Members on the Bronze Plan get the online course only.
- Members on the Silver Plan get the online course and downloadable resources.
- Members on the Gold Plan get the online course, downloadable resources, and a 30-minute one-on-one session.
How to build a members-only library for your WordPress membership site using Filr and Passster
Here, we’ll show you how to build a members-only library for your WordPress membership site to control access to your website’s content. For this tutorial, you’ll need WordPress, the Filr plugin, and the Passster plugin.
Step #1: Install and activate the Filr plugin
The Filr plugin for WordPress lets you easily restrict user-access to files and documents on your membership site and make them available to authorized users only.
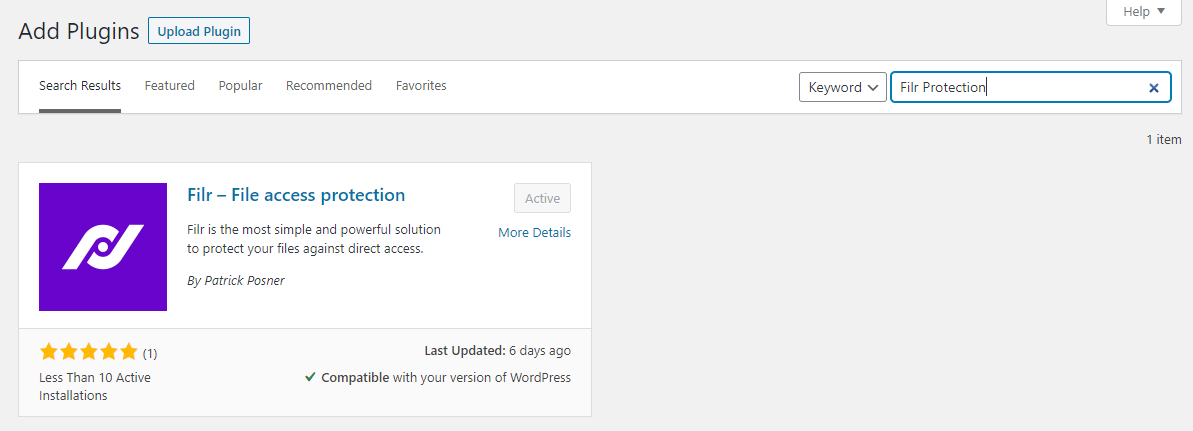
You can use it to securely upload files in any format straight to your membership website in order to build a members-only library. This plugin also gives you different protection options and encryption features, so unauthorized users don’t access the exclusive content.
Get the Filr plugin and install it on your WordPress website. Once that’s done, click the Activate button to proceed.
Step #2: Create a library to organize your files
Create a new library that will be used to organize your files and documents for members. This will help you sort your files and documents while keeping the back-end organized.
From your WordPress dashboard, go to Filr > Libraries. Give a title to your library and enter a brief description. Click the Add New Library button to continue.
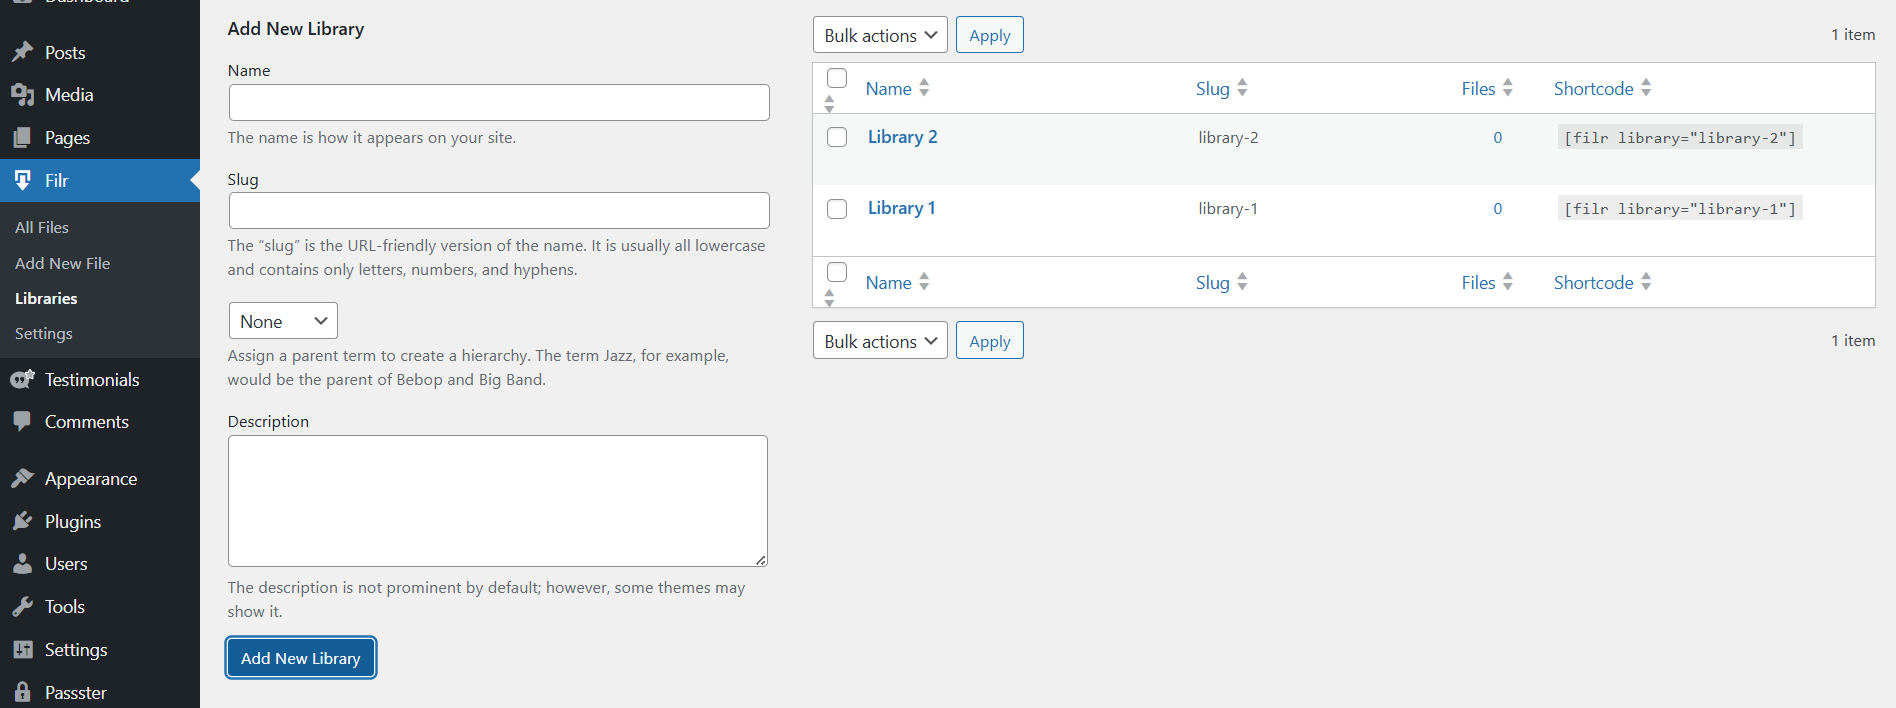
A new library will automatically appear on the right-hand side of the page along with a shortcode.
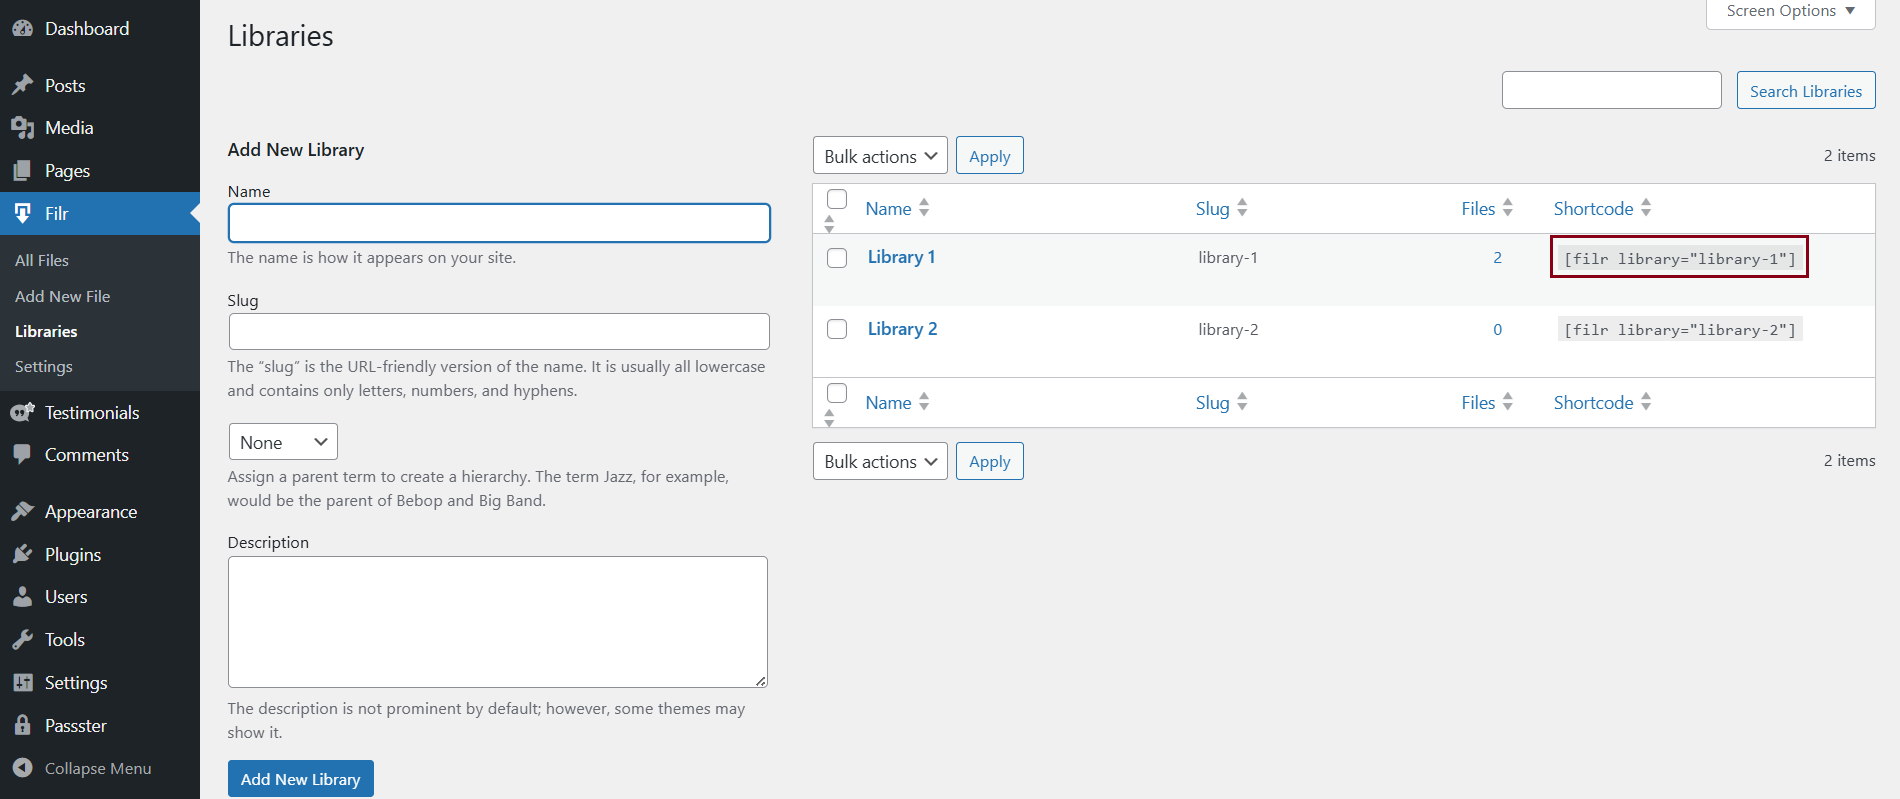
We’ll use this shortcode later in the tutorial to display the members-only library on the front-end of your WordPress website.
Step #3: Upload your files to WordPress
Filr makes it easy to create a document library in WordPress. It lets you:
- Add one or more files straight to a secure folder on your WordPress membership site.
- Group files based on libraries, helping you easily track and manage documents on the back-end.
- Set files to expire on a specific date or after a set number of downloads.
- Use filename encryption to prevent direct access to files and documents.
In addition to this, you can offer files to your site members using one of two methods:
- Individual files. This option downloads only one file when a user clicks the download button. Use this method if you want members to download a single file or if you want to let them pick and choose which files they’d like to download.
- Multiple files. This allows users to quickly download multiple files from your site at once. Filr automatically creates a single .zip file and generates a direct download link. You should use this option if you want your site members to save multiple files in one go.
Next, we’ll look at how to upload the files and documents to your WordPress membership site.
Navigate to Filr> Add New and enter a title for your files. In the File Upload metabox, upload the files you wish to share with your site’s members.
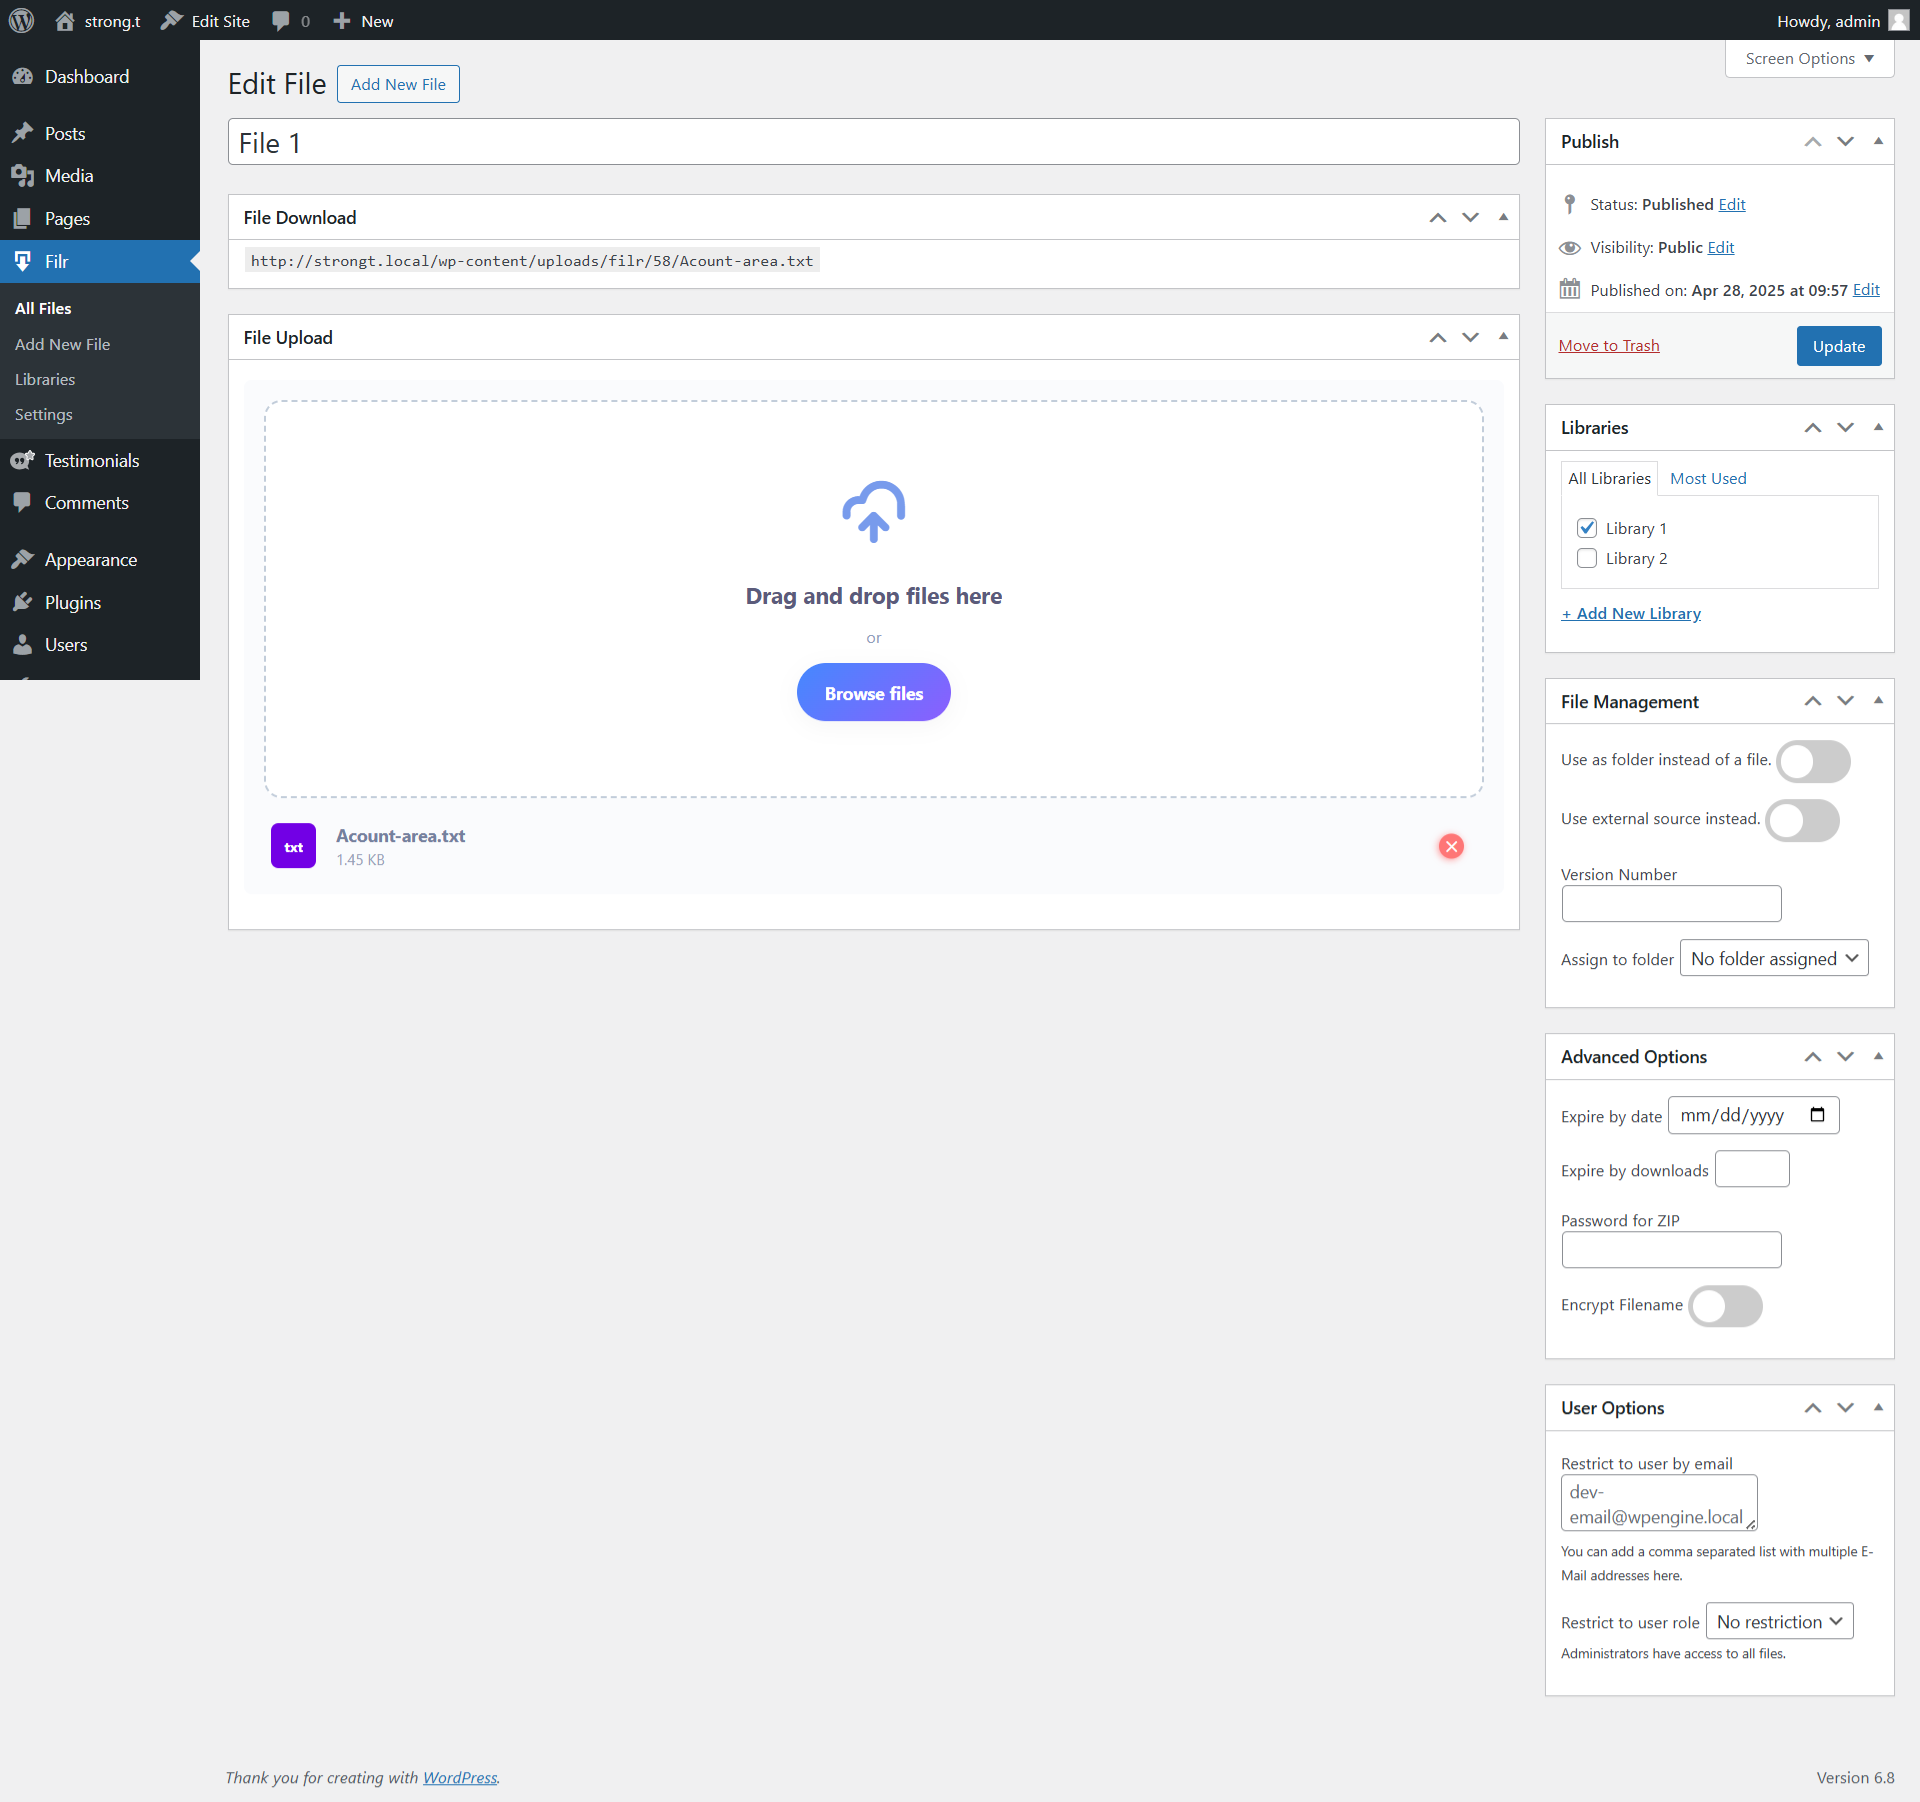
The Libraries metabox on the right-hand side of the page lets you select the library you created in Step #2.
You can set documents to expire based on a specific date or the number of downloads using the Advanced Options metabox. Similarly, you can activate filename encryption by turning on the Encrypt Filename option. Click the Publish button to continue.
Filr – WordPress Document Library Plugin
Easily upload, store and share files in WordPress. Secure, flexible, and user-friendly document libraries for your next project.
Step #4: Install and activate the Passster plugin
Passster is a simple file security plugin that allows you to prevent access to your WordPress content. Here, we’ll explain how you can use it to easily secure a members-only library on your WordPress membership site.
From the WordPress dashboard, go to Plugins > Add New and search for Passster. Install Passster – Password Protection plugin to your WordPress site and activate it.
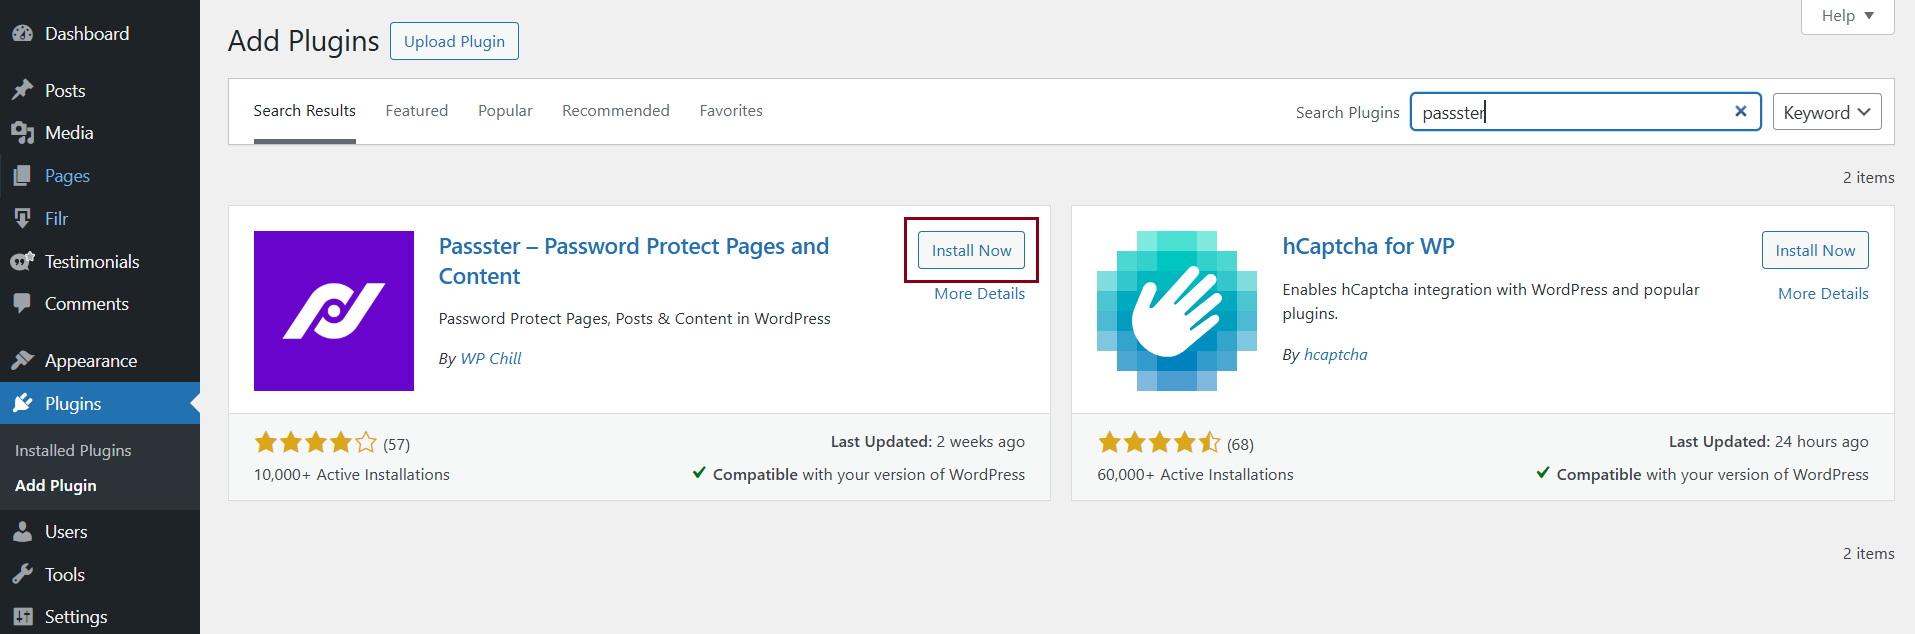
This plugin comes with a free version which only lets you secure content using a single password. Its premium version lets you create multiple passwords to secure content and offers an unlock via link option and user restriction option which you can use to give site members direct access to protected files.
Step #5: Choose the correct type of password protection
After activating the plugin, go to the WordPress dashboard, navigate to “Pages” > “All Pages,” select the page where you added the Filr library shortcode.
In the settings sidebar on the right (if you don’t see this, click the cog icon at the top right of your screen), scroll down until you get to the Passster section.

Now, under Protection Mode, choose how you’d like to protect the content. For member-only access, skip the reCAPTCHA and Turnstile options. Instead, use User Restriction. This lets you limit access to specific logged-in users by their username or user role (like “subscriber” or “member”).
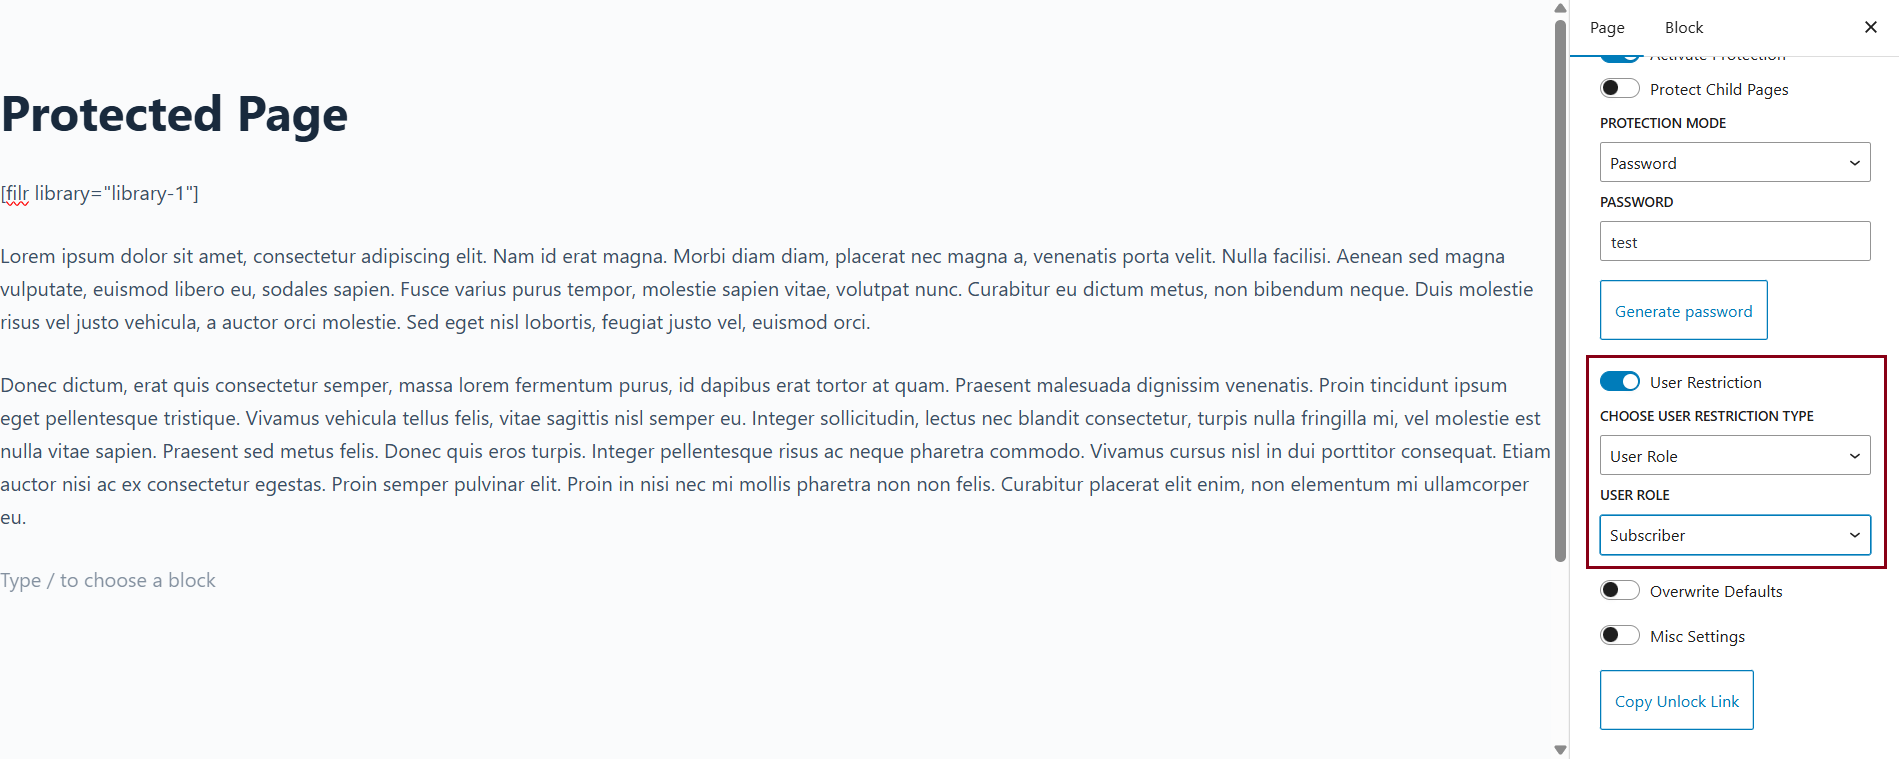
Once you’ve selected the appropriate restriction type, enter the usernames or roles allowed to access the content. You can also use a password or list of passwords if you’re managing access manually, but user-based restriction is the best choice for members-only content.
When you’re done setting everything up, click Update at the top of the page.
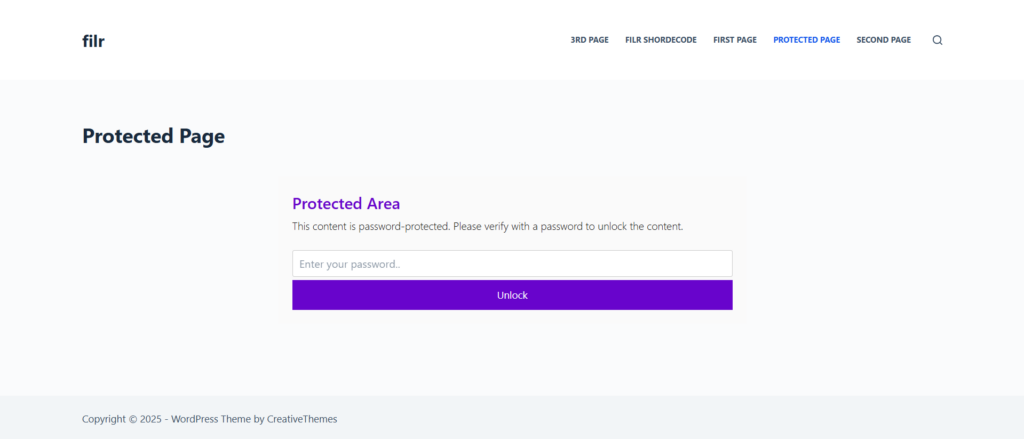
That’s it—your content is now restricted to members only using Passster.
Conclusion
Managing and protecting members-only content is incredibly easy with Filr and Passster. You can use these plugins to build a members-only library for your WordPress membership site and offer exclusive content – including downloadable resources – through it.
Passster
Protect your entire website, entire pages, or just parts of your content with one or more passwords.