

WordPress stores every file you upload in a publicly accessible folder. Anyone who discovers the URL — by guessing a path, stumbling across a search result, or following a shared link — can download your content without restriction. The best way to protect WordPress media files is to encrypt your entire /wp-content/uploads/ directory at once, rather than gating files individually.
This guide explains why WordPress leaves media files exposed by default, then shows you how to protect your entire WordPress media library at once using Filr — no file-by-file setup required.
You’ll learn:
- Why the WordPress uploads folder is publicly accessible by default
- Who needs to protect WordPress media files — and why
- How Filr encrypts and secures your entire media library in one step
- How to restrict specific files to particular user roles or emails
—
Why protecting WordPress media files matters
WordPress powers over 43% of all websites on the internet (W3Techs, 2025), which makes the platform’s default file handling a widely shared concern.
By default, every image, PDF, video, and audio file you upload is stored in /wp-content/uploads/ and is publicly readable. If someone finds the direct URL — or if Google crawls and indexes it — your file is available to everyone, not just your intended audience.
Websites that need to protect WordPress media files:
- Photographers who display portfolio work online but need to prevent high-resolution originals from being downloaded without authorisation
- Bloggers and content creators who use gated PDFs or infographics as lead magnets
- WooCommerce stores whose product imagery and digital downloads need to remain proprietary
- Membership sites that offer exclusive video or document content to paying members
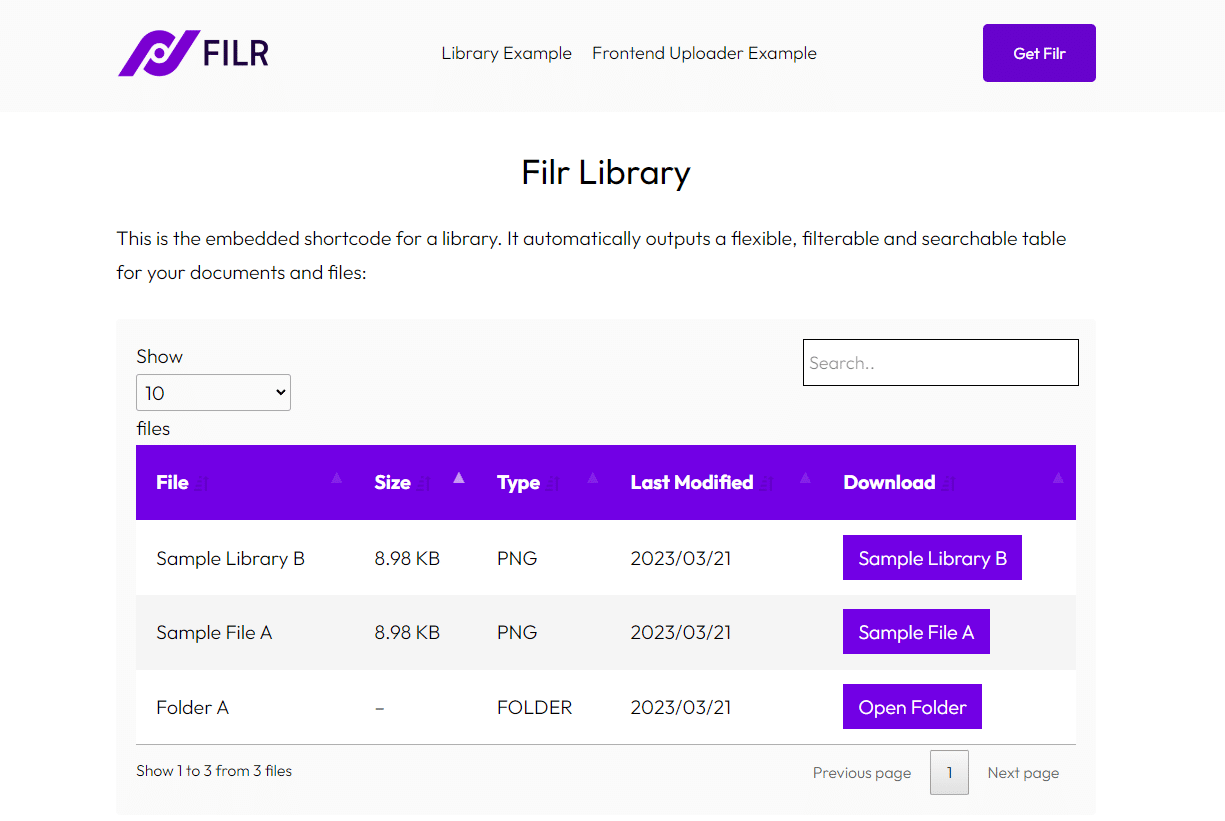
Protecting your media files prevents unauthorised downloads, blocks copyright infringement, stops competitors from taking product imagery, and ensures search engines cannot index content you intend to keep private.
—
What the default WordPress setup doesn’t protect
WordPress is a capable CMS, but file-level security is not part of its default setup. Here’s what’s exposed out of the box.
How WordPress stores your uploads
Files reach WordPress in two ways:
- The Media Library — the built-in uploader in your WordPress dashboard. It handles practically any file type and is the standard method for most users.
- FTP to wp-content/uploads — for bulk transfers, developers connect via FTP and upload directly into the uploads directory.
What is wp-content/uploads? The default directory where WordPress stores every uploaded file — images, PDFs, videos, audio, and documents. All files here are publicly accessible by direct URL unless you actively block access.
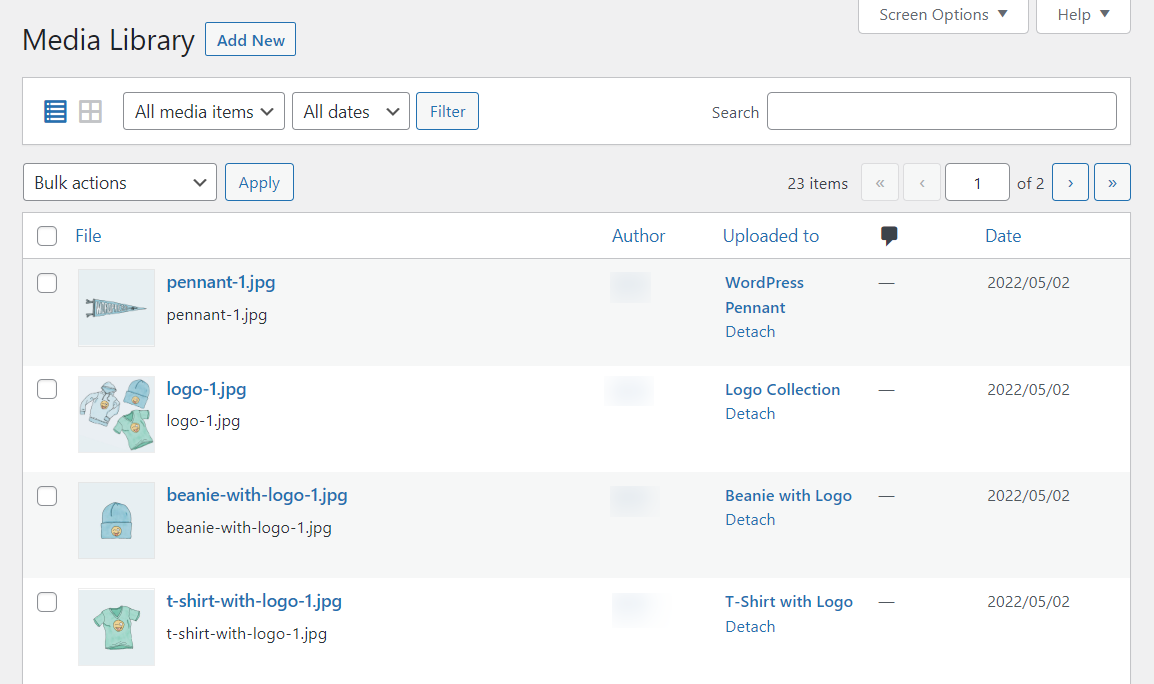
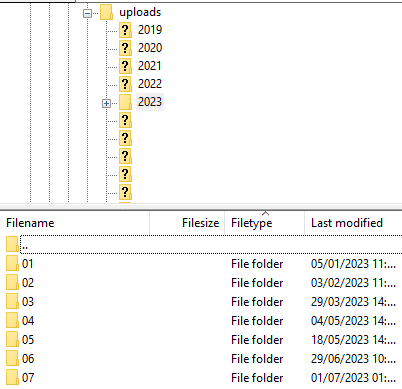
Both methods drop files into the same publicly accessible folder on your server.
Why WordPress leaves your media files unprotected
WordPress does not protect media files by default. Everything in /wp-content/uploads/ is reachable via direct URL — no login required.
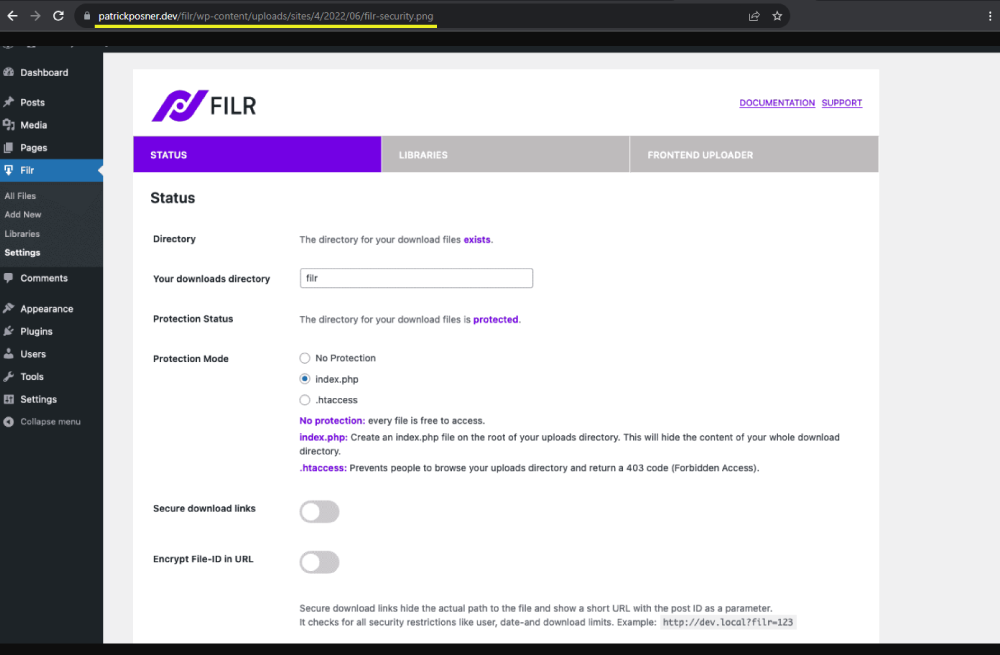
Beyond unauthorised downloads, the default setup creates two further risks. First, the directory itself can be browsed if directory listing is enabled on your server, exposing the complete list of your uploaded files. Second, attackers can inject malicious code into media assets to spread malware to your site’s visitors.
WordPress offers no built-in way to block directory access, encrypt file URLs, or limit file downloads by user role. For any of that, you need a plugin.
Need per-file PDF protection instead? If you’re looking to password-gate individual PDF documents rather than protect your whole media library at once, see 5 ways to protect PDF documents in WordPress for targeted per-document methods.
—
Filr: bulk protection for your entire WordPress media library
Filr is a WordPress file management and protection plugin. Unlike solutions that require per-file configuration, Filr protects your entire media library at once. It does this by encrypting file IDs, generating secure download links, and blocking directory access via .htaccess or index.php — all applied globally in a single settings save.
What is .htaccess? A configuration file read by Apache web servers that controls access rules, URL rewrites, and directory permissions. Filr writes the necessary rules into this file automatically — you don’t need to edit it by hand.
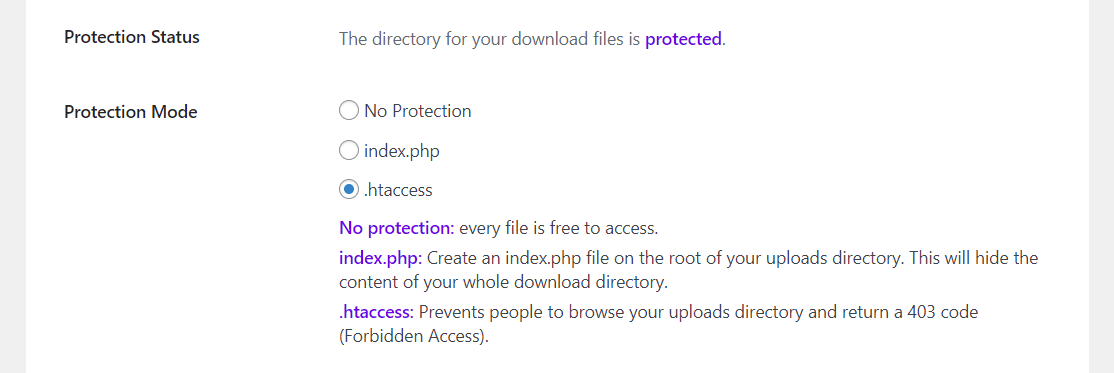
Filr’s core protection features:
- Encrypt File IDs — masks the attachment ID that WordPress appends to every URL by default, so unauthorised users cannot discover the original file path.
- Secure download links — replaces long, guessable upload paths with short, obfuscated URLs. Even if someone copies a link, they cannot reverse-engineer the file location.
- Block directory access via .htaccess or index.php — automatically creates rules that prevent browsing of your uploads folder and returns a 403 Forbidden response to anyone who tries. This also prevents search engines from indexing the folder.
- Restrict file access by user role or email — limits which logged-in users can download specific files, making it useful for membership tiers and client portals.
- Restrict file uploads by user role and email — controls who can contribute new files to your site, not just who can download them.
That combination — encryption, secure links, and directory blocking — distinguishes Filr from simpler access-control plugins. The first three features apply to your whole library in one settings save, without touching individual files.
—
How to protect your WordPress media library with Filr
To get started, buy and download Filr from wpdocumentlibrary.com.
Install Filr:
- Go to Plugins > Add New in your WordPress dashboard and click Upload Plugin.
- Select the Filr ZIP file and click Install.
- Once installation completes, click Activate Now.
- Enter your licence key and click Agree & Activate.
Step 1: Secure your entire media library via encryption
This single step applies bulk protection to every file already in your library, plus any file you upload going forward.
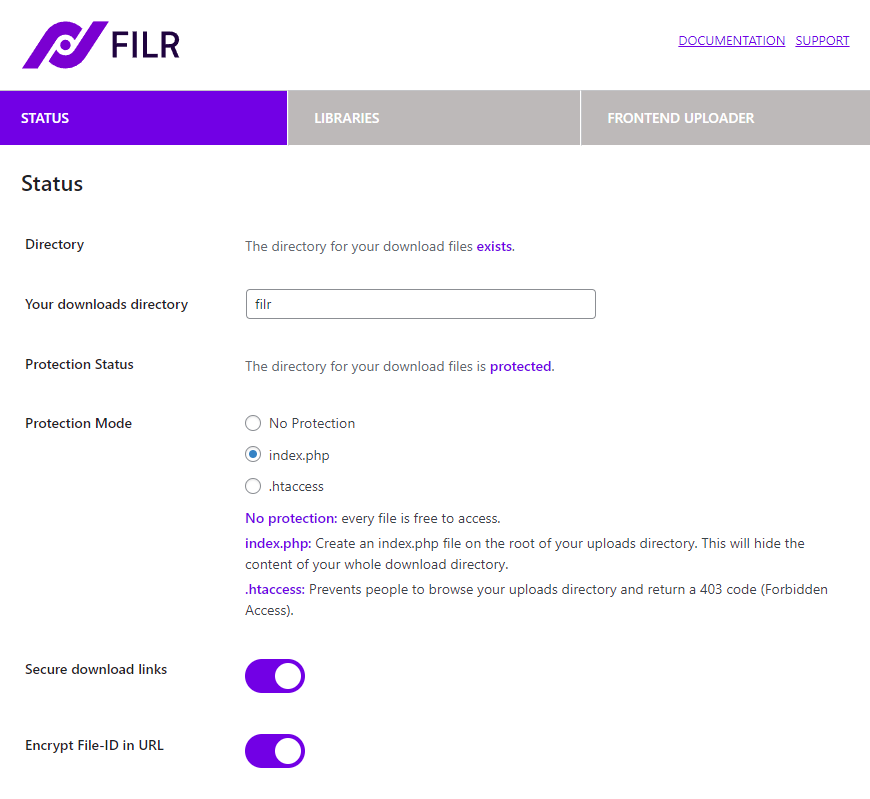
- From your dashboard, go to Filr > Settings and open the Status tab.
- Choose your Protection Mode. For the strongest protection, select .htaccess — this blocks directory browsing for your entire uploads folder and prevents Google from indexing it. If your server uses NGINX, choose the index.php option instead.
- Toggle Secure download links on. Filr generates short, obfuscated URLs for every media file.
- Toggle Encrypt File-ID in URL on. This replaces the WordPress attachment ID with a Filr-generated ID.
- Save your changes.
Three settings. Your entire media library — every file, past and future — is now protected.
Step 2: Restrict a specific file to a user role
The global settings in Step 1 block anonymous access to file URLs. If you also need to restrict a file to a specific group of logged-in users — for example, Editors only or a particular membership tier — Filr handles that at the individual file level.
- Go to Filr > Add New to create a new protected file.
- Upload your file (JPEG, PNG, PDF, video, or any other format WordPress accepts).
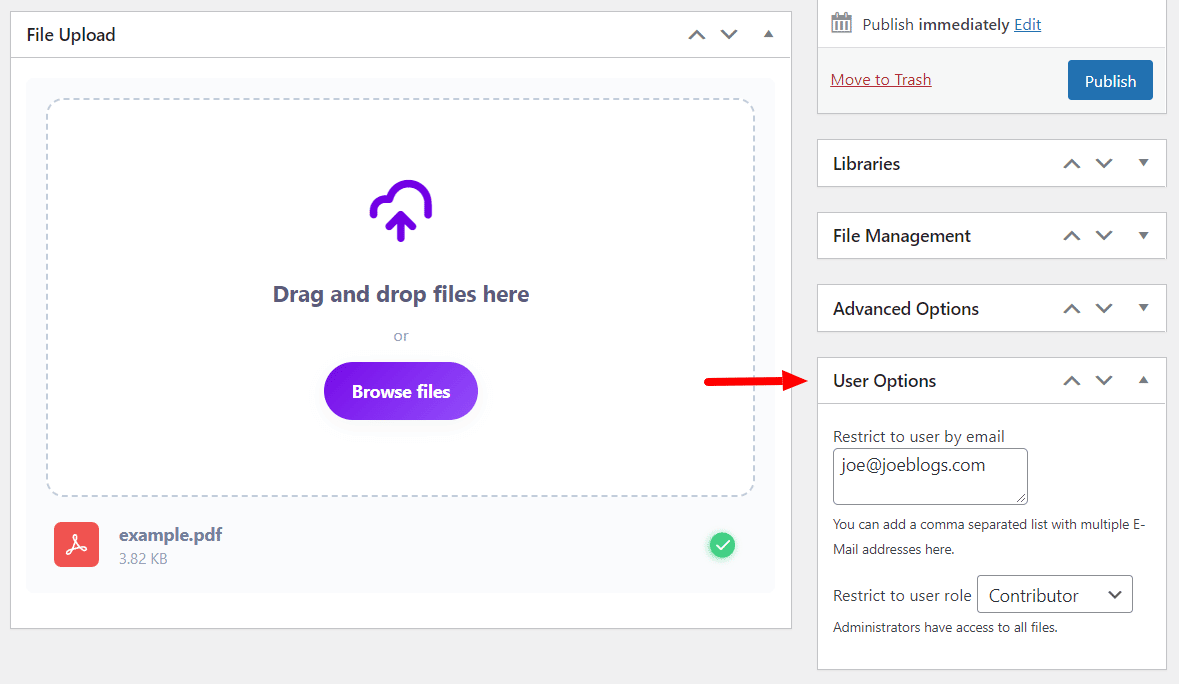
- In the User Options panel on the right, choose the user roles that may access this file. Here, we’ll restrict it to Editors only.
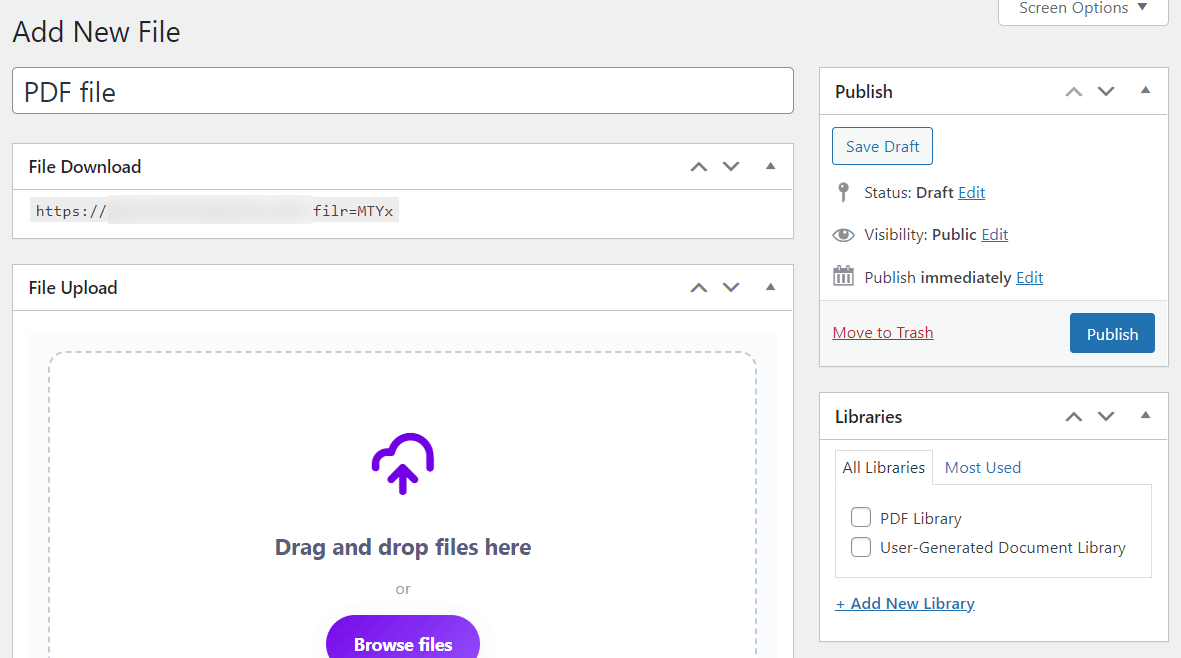
- Publish the file and copy the File Download URL from the top of the page.
To embed the protected file in a page or post, paste the download URL into your content. The file appears for permitted user roles and is invisible to everyone else — unauthenticated visitors and search engines included.
—
Protect your WordPress media files today
WordPress gives you great control over uploading and organising files. But its default storage makes every upload public from the moment it lands on your server.
Filr closes that gap. Photographers, membership sites, WooCommerce stores, and any site handling sensitive documents can secure their entire media library in a few clicks — encryption, secure links, and directory access control all applied at once. Role-based restrictions let you go further for files that need a narrower audience.
Get Filr and protect your media library today.
—
Frequently Asked Questions
Yes — by default, any file in /wp-content/uploads/ is publicly accessible to anyone with the direct URL. Filr’s encrypted file IDs and secure download links make those URLs unguessable, so direct access is blocked even if a link is shared or discovered.
Install Filr and enable .htaccess protection mode, secure download links, and file-ID encryption under Filr > Settings > Status. These three settings block direct URL access and directory browsing across your entire media library at once.
Filr’s .htaccess protection mode automatically blocks search engine crawlers from browsing your uploads directory. Once you enable it under Filr > Settings > Status, Google and other search engines can no longer index files in /wp-content/uploads/.
A password-protected page only restricts the page itself. Anyone with the password — or anyone the password-holder shares the direct file URL with — can still access the underlying file. Encrypting file URLs with Filr replaces the original file path entirely, so sharing a URL doesn’t expose the file regardless of how the link was obtained.
Yes. Filr lets you restrict each file to specific WordPress user roles (Administrator, Editor, Author, Contributor, Subscriber) or individual email addresses. Users without the permitted role see nothing — no download prompt, no broken image placeholder.
Filr works with any file type WordPress accepts — images (JPEG, PNG, GIF, WebP), documents (PDF, DOCX), audio, video, and more. The bulk protection applied in Step 1 covers every file in your library, regardless of format.
No — .htaccess rules are Apache-specific. If your server uses NGINX, select the index.php protection mode in Filr’s settings instead. Both modes achieve the same directory-blocking result on their respective server stacks.