

Academic organizations, research institutions, and publishers share a common challenge. They need to make dozens — sometimes hundreds — of journals, working papers, conference proceedings, and reports available to readers in an organized, searchable format. A static page of PDF links breaks down fast. A proper WordPress publications library solves that.
For a broader introduction to hosting documents on WordPress, see the WordPress document library overview. This guide focuses specifically on setting up a library for academic and research publications using the Filr plugin.
What is a WordPress publications library?
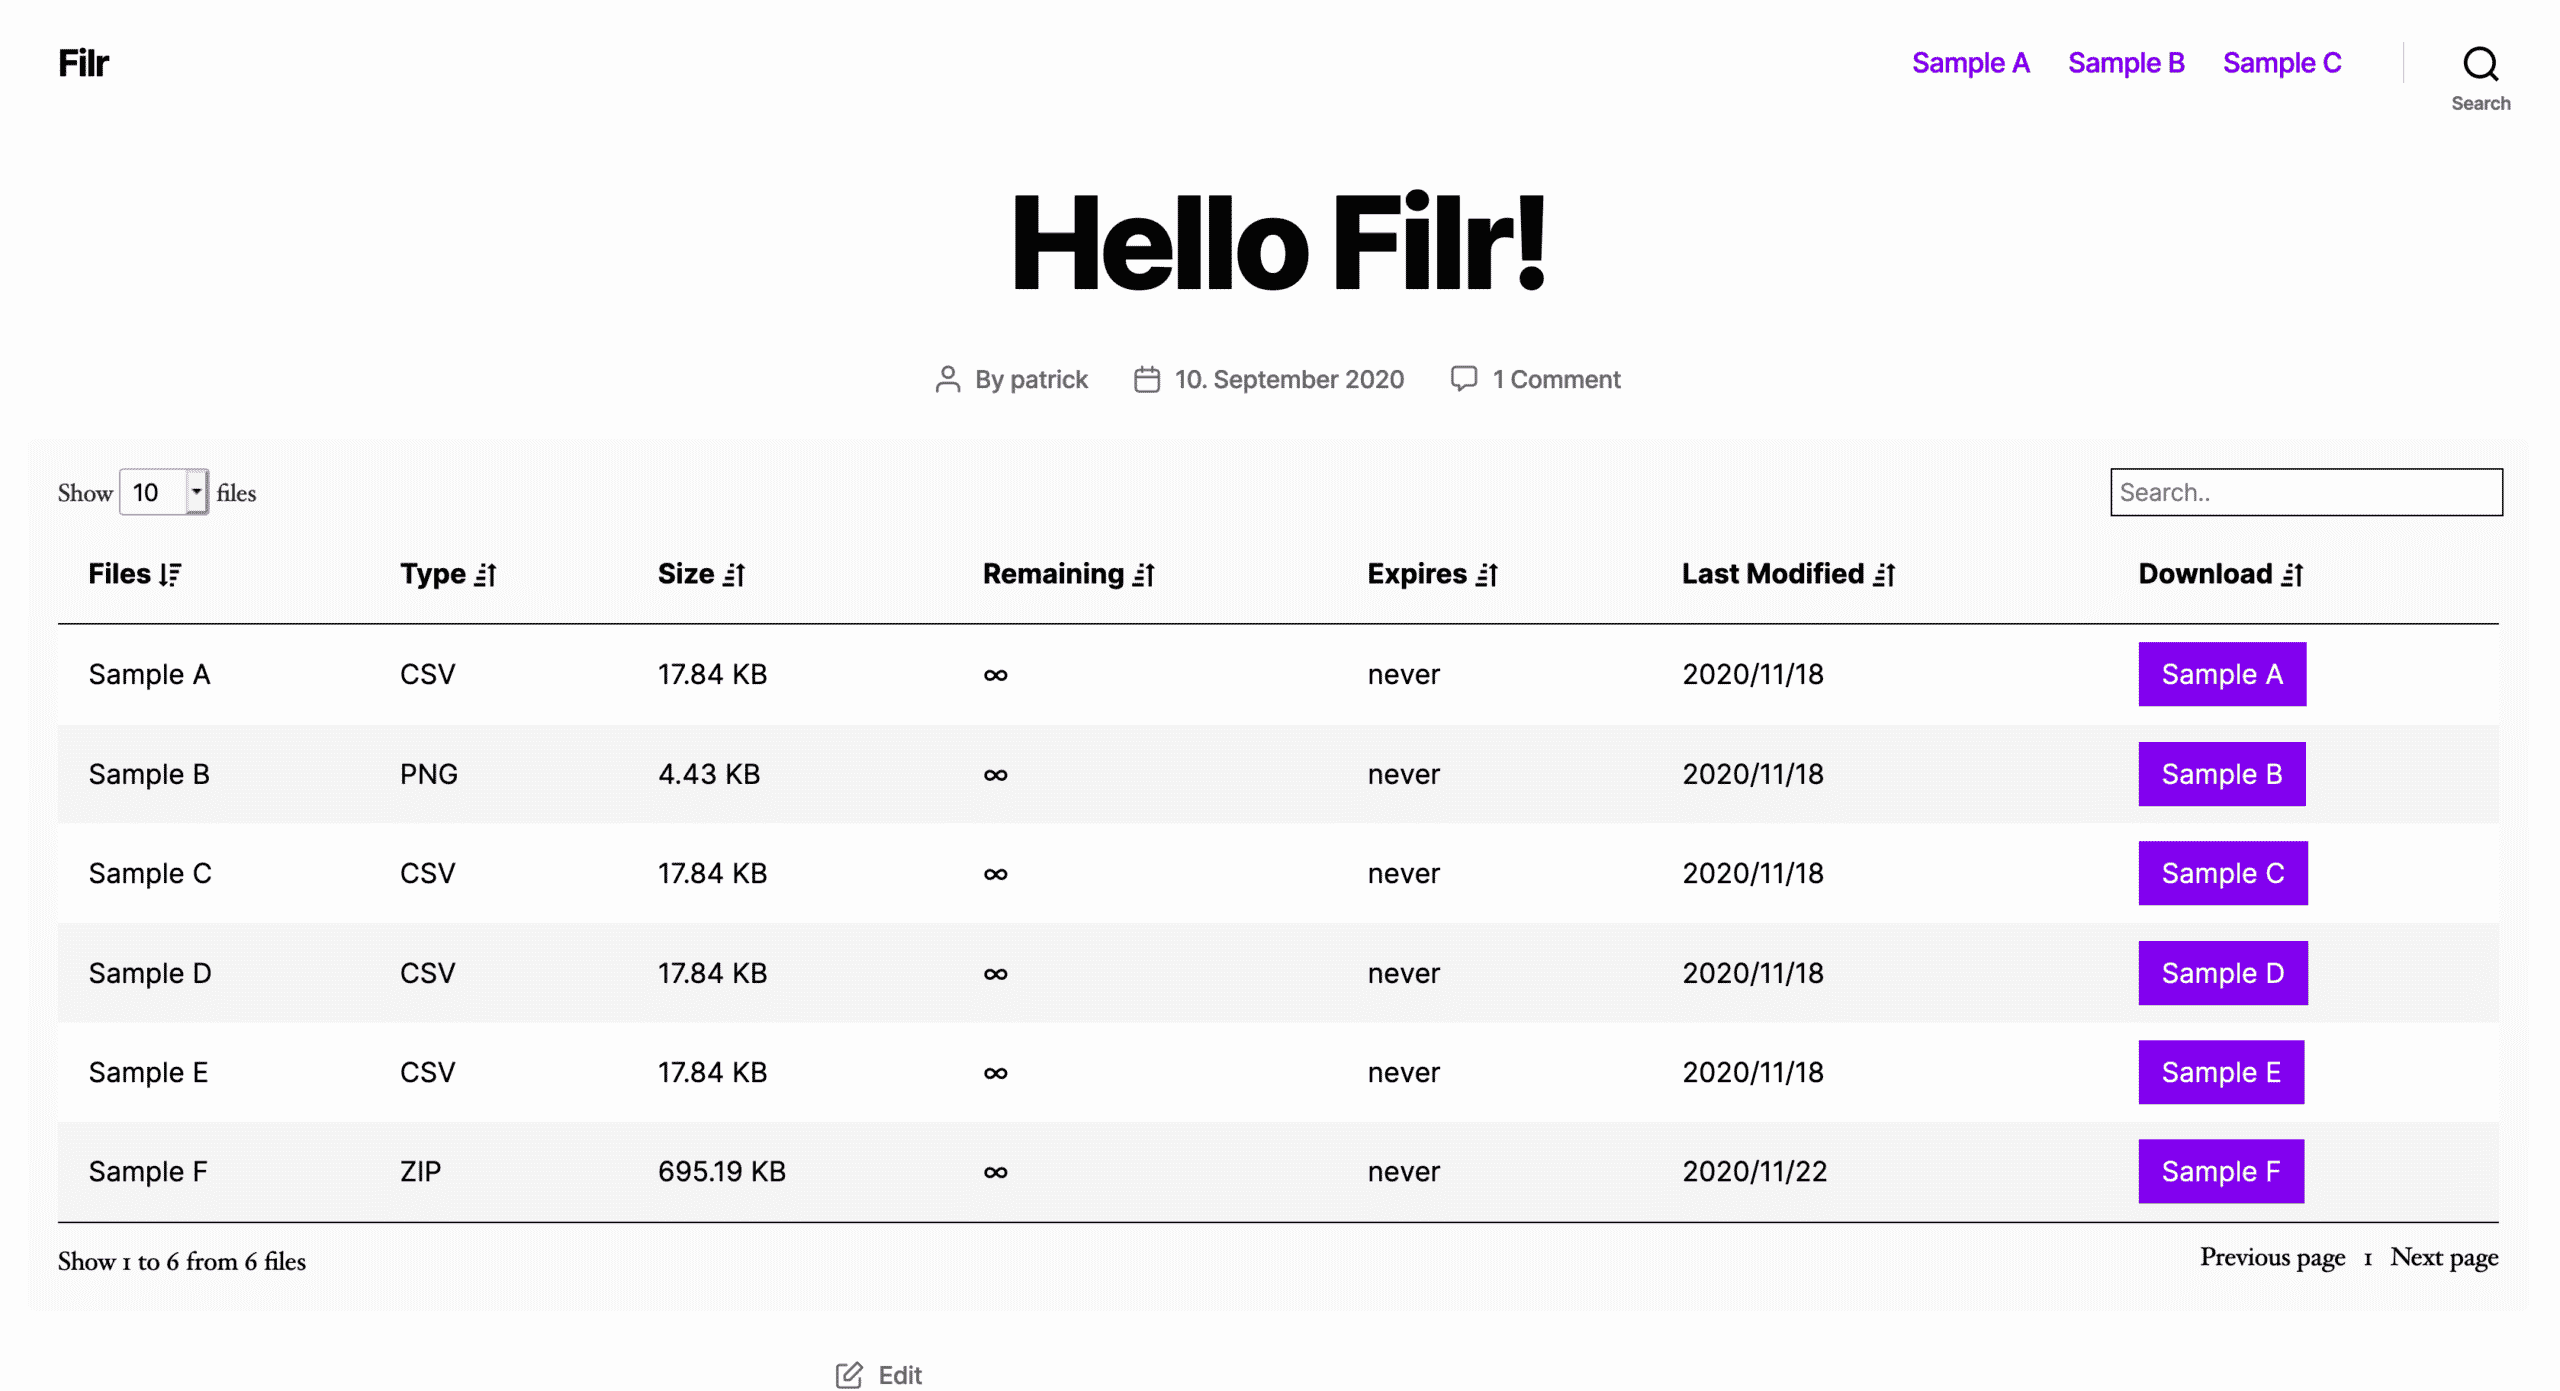
A WordPress publications library is a structured, searchable collection of documents — journals, papers, reports, proceedings — displayed on your website using a dedicated plugin. It gives visitors a filterable, paginated interface rather than a long, unmanageable list of links.
Unlike a static list of links, a proper library gives you control: you can organize publications by category, type, or date; let visitors search by keyword; restrict access to paid subscribers or members; and add metadata like author, abstract, or DOI for each entry.
Organizations often set up a publications library as part of a research portal, journal archive, or internal knowledge base. WordPress is a practical choice because existing content management infrastructure is already in place — adding a publications library means extending what you already have, not starting from scratch.
Why academic organizations need a dedicated publications library
Academic organizations need a dedicated publications library because scattered files and generic media uploads make documents nearly impossible to find, manage, or protect. A dedicated plugin provides structure, searchability, and access controls that WordPress’s built-in tools lack.
Research teams, journals, and policy organizations publish across multiple document types — working papers, datasets, policy briefs, conference proceedings. A dedicated library lets readers filter by type, search within results, and access the most recent version of each document without contacting staff for help. The practical benefits include:
- Organized browsing: Visitors can filter by category, type, date, or custom taxonomy instead of scrolling through a long unformatted list.
- Access control: Restrict documents to members, subscribers, or specific user roles so unpublished drafts or paywalled content stays protected.
- Version management: Replace files in place without breaking existing links or requiring visitors to find the new URL.
The Media Library stores files for internal use; a publications library built on a plugin like Filr presents those files to visitors in a structured, searchable, and permission-aware way.
How to create a publications library in WordPress using Filr
The Filr plugin — also known as WP Document Library — handles file upload, metadata entry, library display, and access control within a single WordPress plugin. The steps below walk through the complete setup from installation to a live, filtered publications page.
Step 1: Install the Filr plugin
Filr is a WordPress plugin that helps organizations upload, organize, and display documents in a searchable library. It provides a filterable grid or table view that visitors can search by title, category, or custom fields, and it supports access control so you can restrict documents to specific user roles or password-protect individual files.
The plugin includes file protection features: filename encryption, direct-link prevention, and optional member-only access. For a publications library, these controls matter when you’re publishing pre-release research, paywalled journal content, or internal policy documents alongside publicly available papers.
Get the Filr plugin, then install it from the WordPress dashboard under Plugins > Add New. Upload the .zip file, activate the plugin, and proceed to the setup steps below.
Step 2: Create a library
Libraries are the organizational containers for your publications. Each library is an independent collection with its own display settings, column layout, and access rules. You might create separate libraries for journal articles, working papers, and conference proceedings — or a single library for all content types if you’ll use categories to differentiate them.
Go to Filr > Libraries in the WordPress admin sidebar.
A new library appears on the right side of the screen, allowing you to configure which columns are visible, how many rows to display per page, whether filtering is enabled, and what the default sort order is. Name the library to reflect its content — for example, “Research Papers” or “Policy Reports” — so you can reference it easily when adding the shortcode to a page later.
Step 3: Add your publications
Go to Filr > Add New and enter a title for the publication. Attach the file using the file upload field — PDFs, Word documents, Excel spreadsheets, and other standard formats are all supported. Each entry in Filr is a document post type, and you can manage it like any WordPress post: draft, publish, schedule, or restrict by user role.

For academic and research publications, fill in as much metadata as the library will display. The default fields include:
- Title: The publication name as it will appear in the library.
- Summary: A short abstract or description, displayed as a tooltip or in an expanded row.
- Author: Used for filtering and display in the library table.
- Date: Publication or upload date, used for chronological sorting.
You can also set publications to expire by date or by the number of downloads — useful for limiting access to pre-release materials or tracking distribution of limited-run reports.
Step 4: Organize publications by type and category
If your organization publishes multiple content types — journal articles, working papers, policy briefs, conference proceedings — organize them using Filr’s category and custom taxonomy support. This allows readers to filter the library to show only the content type they need, rather than browsing everything at once.
Filr uses WordPress’s built-in taxonomy system. Create categories that match your publication types under Filr > Categories. Assign each document to the appropriate category or categories when you create or edit it. You can also create custom taxonomies for more granular organization — by research area, funding body, or publication series.
On the front-end, readers can then filter the library by category using the built-in filter dropdowns above the library table. No custom code is required.
Step 5: Display the publications library on the front-end
Create a new page by going to Pages > Add New in the WordPress admin. Add the Filr shortcode to display the library: [filr] displays all documents, and [filr id="1"] displays a specific named library.
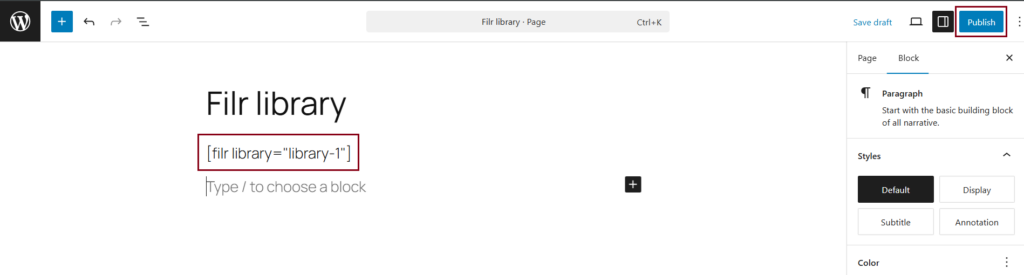
Click Publish. The publications library is now live and searchable. Visitors can browse the full list or use the search bar and filter dropdowns to narrow results by category, date, or author.
To customize appearance — colors, column layout, rows per page, thumbnail display — return to Filr > Libraries and adjust the settings for your library. Changes apply immediately without republishing the page.
Bonus: Secure your publications library
Filr provides three file protection settings to keep unauthorized users from accessing documents directly through their upload URLs. These settings are relevant when your library includes restricted-access content alongside publicly available papers.
Configure these from Filr > Settings > Status. The three protection layers are:
- Filename encryption: Renames uploaded files with randomized strings so the original filename — and any guessable URL pattern — is not exposed publicly.
- Hotlinking prevention: Blocks direct file access from external sites or by users who bypass the publications library page entirely.
- Role-based access: Restricts document visibility or download to specific WordPress user roles, such as subscribers, editors, or custom roles.
For stronger access control — restricting a pre-publication paper to a specific set of named users, or selling access to a journal archive — pair Filr with a WordPress membership plugin like MemberPress or Restrict Content Pro. Filr’s shortcode attributes let you pass access conditions directly in the page embed.
Frequently Asked Questions
Yes. Filr supports bulk import via CSV. Prepare a spreadsheet with columns for title, file URL, category, author, and date, then use the import tool under Filr > Import to load all entries at once. This is the fastest way to migrate an existing publications catalog to WordPress.
Filr supports any file format that WordPress allows in the Media Library, including PDF, DOCX, XLSX, PPTX, and ZIP. PDFs are the most common format for academic publications, and Filr’s table view displays a download link and optional thumbnail preview for each one.
Search is enabled by default in Filr’s library display. Visitors can type in the search box above the library table to filter results in real time. To search within PDF content rather than just titles and metadata, you’ll need an additional full-text search plugin such as SearchWP.
Yes. Use the shortcode attribute logged_in="true" to show the library only to authenticated users. For finer-grained control by user role, combine Filr with a membership plugin to define custom access rules per document or per library.
Yes. Filr’s library display is responsive and adapts to mobile screen widths. The table view collapses to show priority columns on small screens, and the search and filter controls remain accessible. No additional configuration is needed for mobile support.
Create your WordPress publications library
A structured publications library makes it easy for readers to find, filter, and download exactly the documents they need — whether that’s a single policy brief or a full archive of conference proceedings. The Filr plugin handles the upload workflow, front-end display, and access controls without requiring custom development.