

Protecting PDF documents on your WordPress site is crucial, especially if you’re sharing premium content, confidential files, or exclusive resources.
Without proper security measures, unauthorized users can easily access, download, and distribute your files. This can put your content as well as your business at risk.
Luckily, the WordPress ecosystem offers different forms of plugins to safeguard your PDFs. In this post, we’ll explore 4 effective methods to keep your PDFs safe and ensure that only the right people can view or download them.
Let’s begin by understanding the importance of protecting your PDF files.
Why Protect Your PDF Files
PDF files often contain valuable content—whether it’s premium resources, confidential documents, client reports, or digital products. If left unprotected, they can be easily accessed, shared, or even stolen, putting your business and intellectual property at risk.
Here’s why securing your PDFs is essential:
- Prevent unauthorized access – Without protection, anyone with a direct link can download your files, even if they weren’t meant for public access. This can lead to sensitive information being shared or misused.
- Protect your revenue – If you sell digital products or offer exclusive content, unprotected PDFs can be copied and distributed for free. This not only reduces sales but also devalues your content.
- Safeguard sensitive information – Business documents, contracts, and client data can fall into the wrong hands if not properly secured. This can lead to legal risks, data breaches, and a loss of trust.
- Avoid SEO and content duplication issues – Search engines can index your PDFs, making them publicly accessible and vulnerable to content theft. Competitors or unauthorized users could republish your content, harming your SEO rankings and credibility.
Let’s now move on to understand how to protect your PDF files and documents in WordPress.
How to Protect Your PDF Files in WordPress
If you want to protect your PDF files in WordPress, you can do that in a few different ways like –
- Auto-expire PDF files on a specific date
- Auto-expire PDFs based on the number of downloads
- Password protect PDFs with a password
- Protect PDFs with reCaptcha
- Unlock via link
We’ll look at each of these in detail in the following section. Since WordPress does not offer any default option to do the above, we’ll have to use a plugin to get our job done.
We’ll talk about the plugin as and when we describe the processes. So let’s begin.
Method 1: Auto-expire PDFs on a Specific date
In this section, we’ll look at how to protect your PDF files and auto-expire them in WordPress on a specific date. To implement this we’ll be using the Filr plugin.
Filr is an amazing WordPress plugin that lets you safeguard your PDFs with just a few clicks. With this plugin, protecting your PDFs can not just be easy but super quick too.
Filr is available in two version – Lite and Pro. To use this feature of the plugin, we’ll have to use the Pro version of Filr. To get started you can purchasing Filr and then install and activate it in your WordPress dashboard.
Step 1: Create a Document Library
Once you’ve installed and activated Filr, you can start creating your document library. For that, go to Filr > Libraries. On the right side of your screen, you’ll see various fields under the Add New Library option. Here you can fill in the details as labeled.
You just have to fill in your library name, and add the slug. The slug is the same as your library name but in lowercase and with a hyphen in between the names.
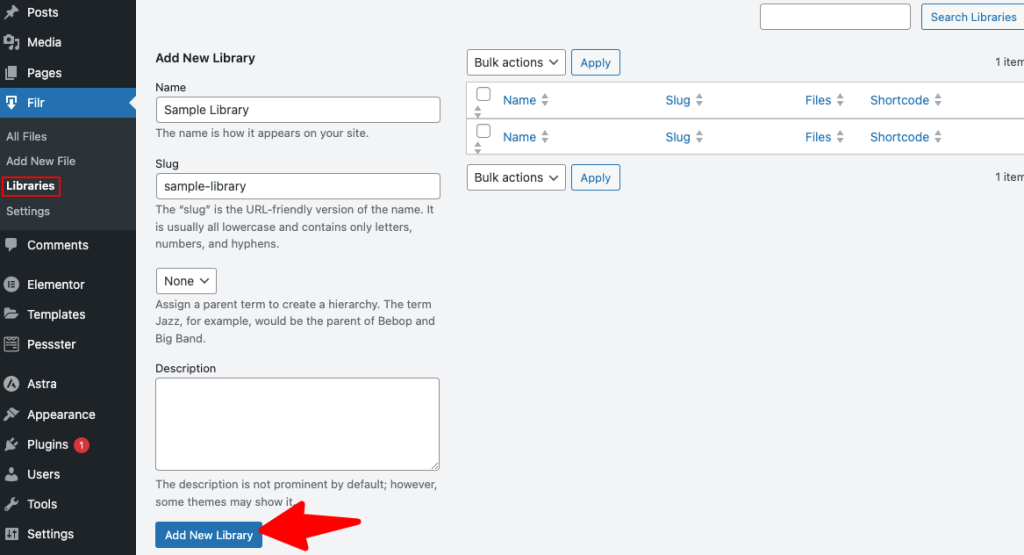
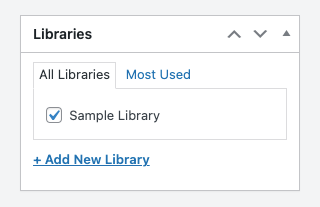
Once done, click on the Add New Library button at the bottom. Now on the right side, you’ll see the newly created library along with the shortcode next to it.

We’ll use this shortcode later to display your document library on your website. Now you’ll have to add your files to this library.
Step 2: Add Your PDF Files Using Filr
Now, you’ll have to add your PDF files to your WordPress website. For that, on your WordPress dashboard, click on Filr > Add New File.
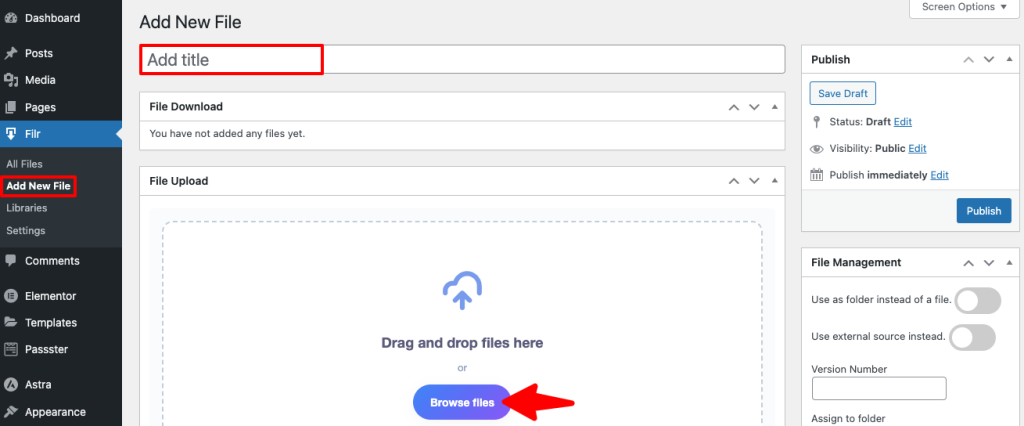
Now add a title to your new file. Then using the Browse Files button, start adding your PDF files one by one.
Step 3: Adding Expiry Date to Your PDF Files
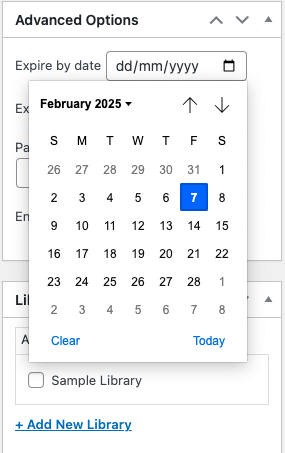
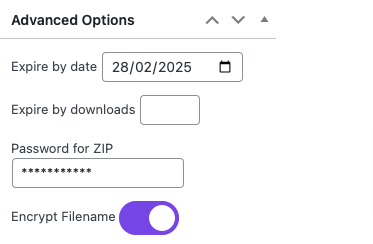
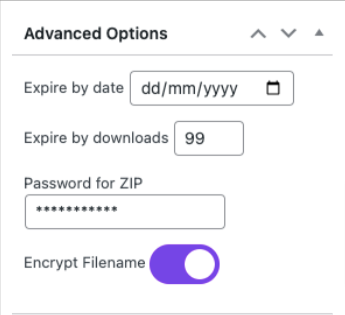
Once you’re done adding your files, go to the Advanced Options section on the right side of your screen. Here you’ll have an option to add the date on which you want the file to expire. You can add your date here.
Then add the Password for ZIP and turn on the Encrypt Filename bar.
Once you’re done, scroll down to Libraries. Here select the library that you’ve just created in step 1 which is Sample Library in this case.
Now hit the Publish button on the top right corner of your screen.
Step 4: Publishing Your Auto-Expiring PDF Files
Now you’re ready to publish your auto-expiring PDF files. If you know which page or post you want to add this PDF, go to that page on your dashboard. You can also create a whole new page if you want.
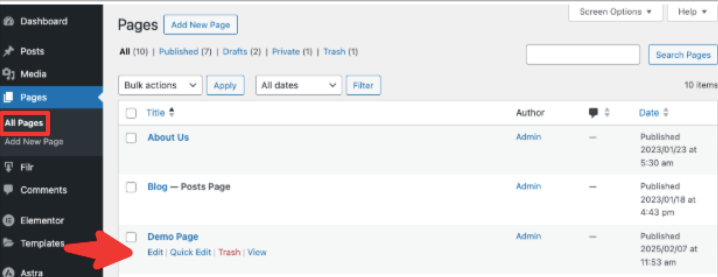
In this tutorial, we’ll add it to an existing page. So go to All Page. Select the page where you want the PDF to show and click on the Edit button.
In this page, copy the shortcode of the document library that you created in step 2.
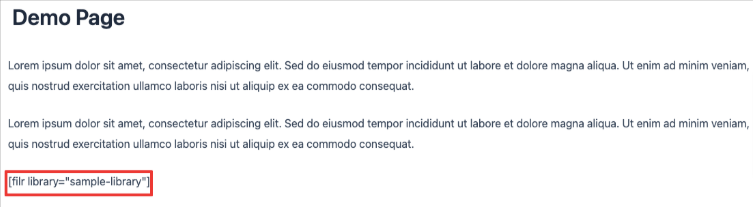
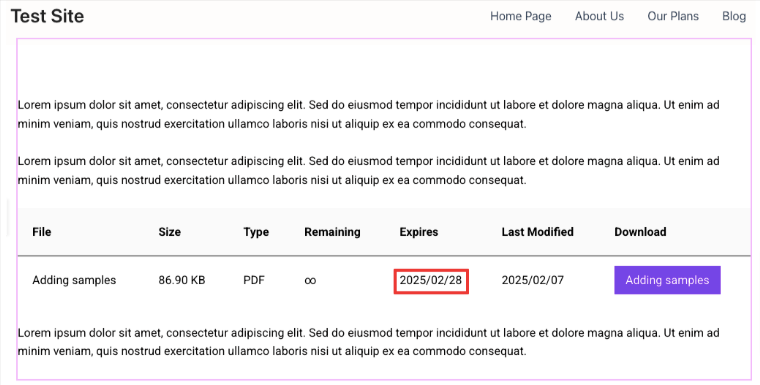
And that’s it. Your password-protected PDF will now appear on your website. This is how it will appear if you want to expire the file by date.
Method 2: Protect PDF Files to Auto-expire Based on Number of Downloads
To protect your PDF files and auto-expire them based on the number of downloads, you’ll need the same Filr plugin.
So you can follow Step 1 and Step 2 from Method 1.
Step 3: Adding Expiry Based on Number of Downloads
Once you’ve followed steps 1 and step 2 from Method 1, we’ll move on to adding expiry to your PDFs based on the number of downloads.
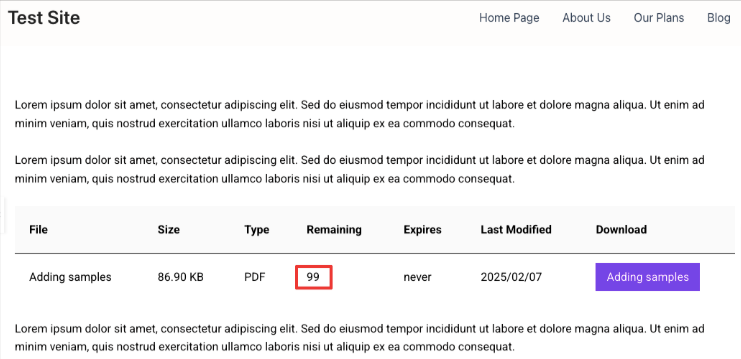
For that, under Advanced Options, instead of selecting Expiry by date, add the number of downloads after which you want to expire your PDF. Let’s add it as 99.
Everything else remains the same. Now hit the Publish button on the top right corner of your screen.
Here’s how it will look if you want it to expire based on the number of downloads.
Method 3: Protect PDFs with a Password
For this method, we’ll be using a different plugin called the Passster plugin. Passster is a robust WordPress plugin that lets you protect your WordPress PDF files and documents in a number of ways. Password protecting your PDF files is one of them.
To password-protect your PDFs with Passster, you first need to install and activate it on your WordPress dashboard. Let’s check out what to do next.
Step 1: Creating Protected Areas in WordPress
Once the plugin is activated on your website, you’ll have to add a protected area to your WordPress website. In WordPress, protected areas refer to parts of your website or content that are restricted from public access.
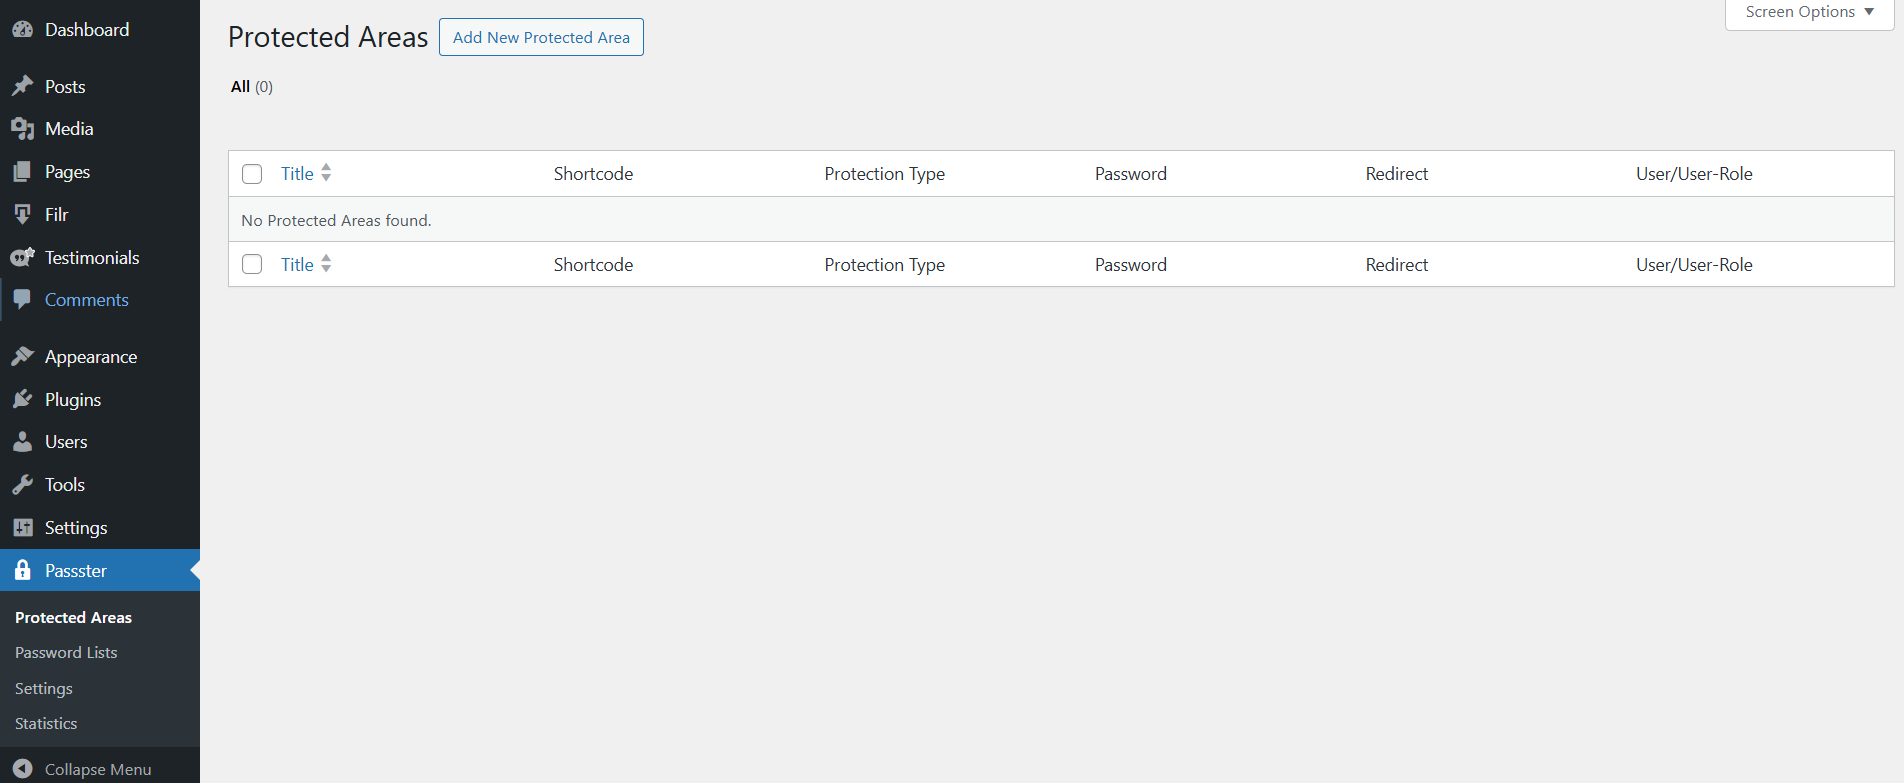
When creating the protected areas, we’ll first upload the PDF file to your WordPress website. For that, on your WordPress dashboard, go to Passster > Protected Areas > Add New Protected Area.
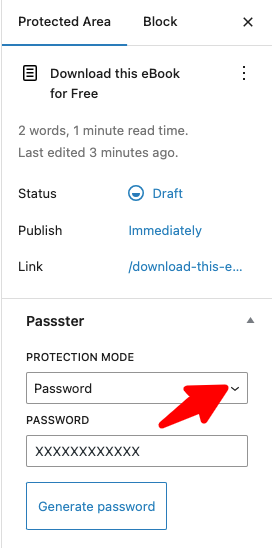
This will open a new page. On this page, add a title for your Protected Area.
Next, in the content section of this page, click on the ‘+’ sign of the Gutenberg editor. Then using the search box, search for File.
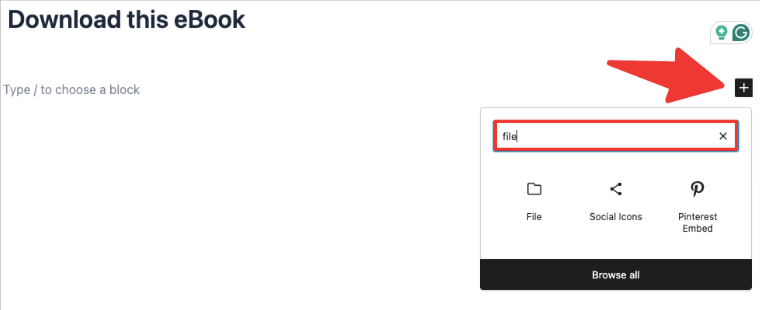
Now select the File option and use the Upload button to upload the PDF file that you want to add to your website.
Now on the right side of the screen, under Protected Areas, you’ll see an option called Protection Mode. Under this, click on the drop-down arrow and select Password. Then click on the Generate Password option below it.
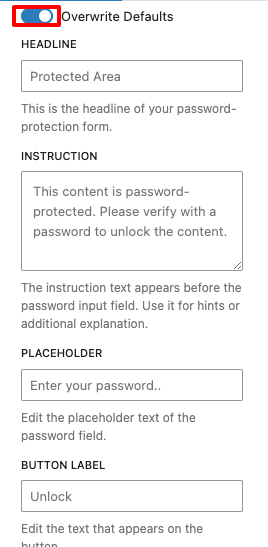
Next, activate the Overwrite Defaults option by clicking on the toggle bar. This is not mandatory. But turning this option on allows you to customize the texts of your password-protected form. Under this, you can change the headline, add instructions for your user, label your button, etc. Go ahead and add all of this information as per your requirements.
Now, if you scroll further down you’ll see a Copy Shortcode button. Click on this button and copy it.
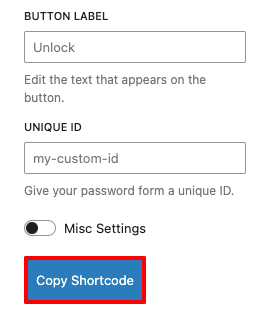
Once you copy it, hit Save > Publish on the top right corner of your screen.
Step 2: Publish your Password-Protected PDF on your Website
Now, it’s time to publish your password-protected PDF on your website. You can either publish this PDF on an already published page or create a new one.
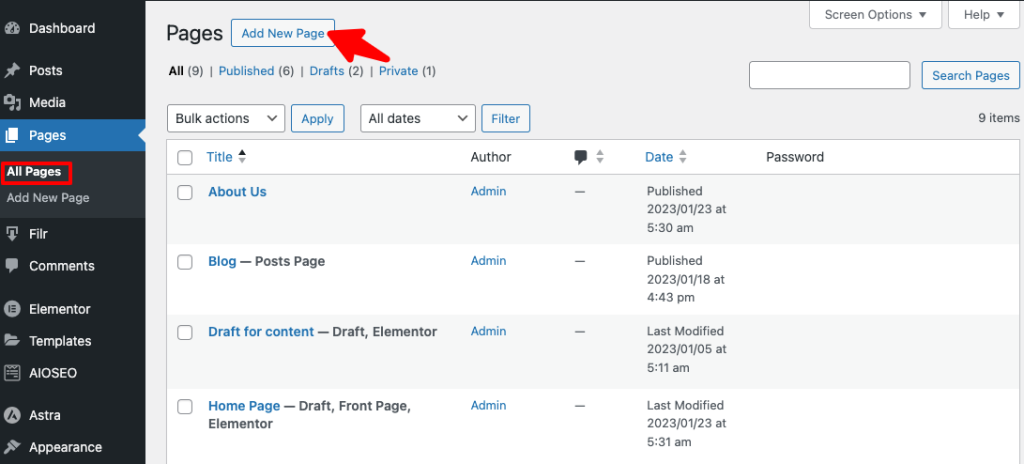
All you have to do is add the shortcode that you copied in the above step to the page where you want it to appear. So let’s go to Pages > Add New.
Once the page opens, add the title and content like you normally do to a WordPress page. On this page, add the shortcode that you’ve just copied.
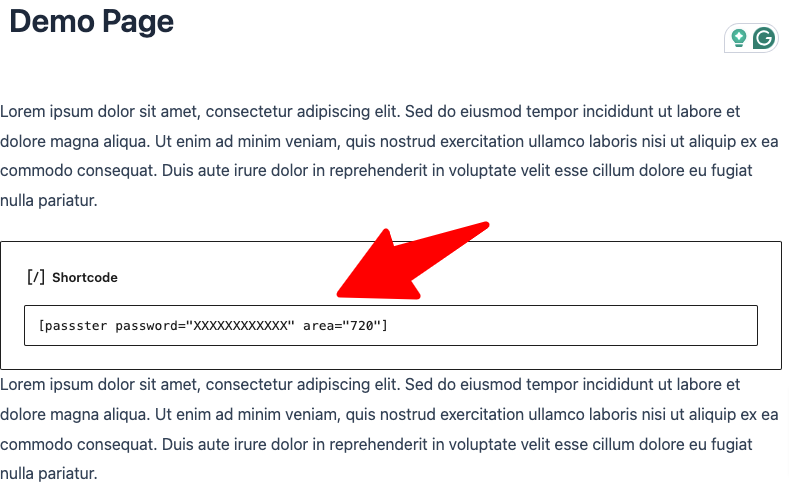
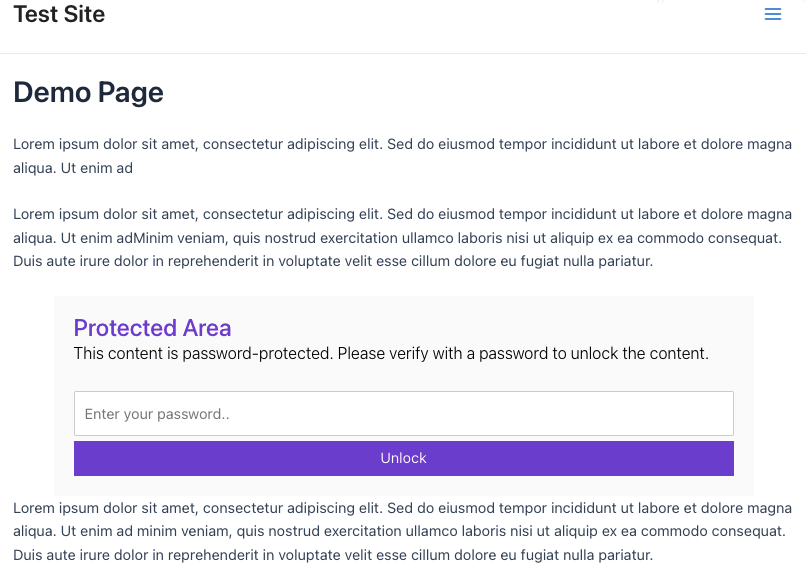
And that’s it. Your password protected PDF will start showing on your website. Anyone with a password only will now be able to access it.
Method 4: Protect PDFs with reCaptcha
Another method to protect your PDF files is to add a reCaptcha to unlock it. Doing that is extremely simple. You can use the same Passster plugin for this method too.
You can follow the exact same steps as you did in the above method. The only difference here would be in Step 1.
After uploading your PDF file, under the Protection Mode you’ll have to select reCaptcha instead of Password.
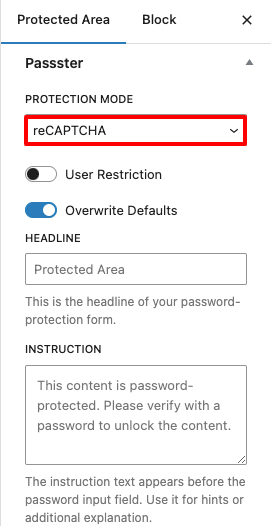
Everything else will remain the same as in Method 3.
Method 5: Unlock via Link
Another way to protect your PDF files in WordPress is to let your users unlock it via a link. You can use Passster’s Unlock via link feature to grant users direct access to restricted content using an encrypted link.
Passster will automatically generate a link for you using which you can direct people straight to a post or page on your website. Let’s see how to use this feature.
Step 1: Create a New Page
The first step is to create a new page. You can also use this step on an existing page. To create a new page, go to Pages > Add New Page.
Now add a name and your content to this page. Then on the right side of your screen select Page. Under this, click on Activate Protection. Next, select Password under Password Mode and click on the Generate Password button. Once you do that, go to the Copy Unlock Link button.
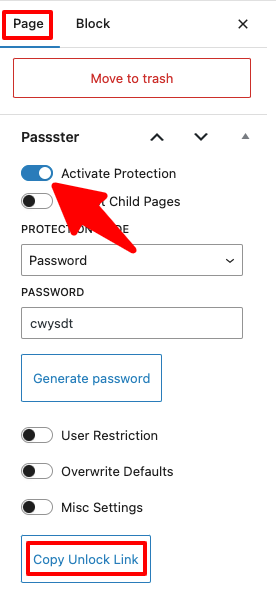
You can click on this button to copy the link and share it with your users.
Conclusion
Protecting your PDF files is extremely essential if you want to control its access and protect them from being misused. With plugins like Passster and Filr, you can easily add password protection to your files and documents and safeguard them by restricting unauthorized downloads.
Whether you’re safeguarding premium resources or private documents, these tools offer reliable solutions to keep your files safe.